The MixPre II series from Sound Devices has a new feature that can boost the confidence of anyone not sound savvy. The spec is its combination of 32-bit float recording and multiple analog to digital convertors.
Before detailing why it’s so great, let’s poke at it with the analogy of buying a new camera.
When considering one it may need to tout certain specs like a wide dynamic range or high-resolution recording. A feature often discussed is lossless compressed RAW recording. The holy grail of that type of file is one that doesn’t lose any image data and is compressed in a very small file size. ARRI, Sony, Nikon, Canon, RED, and Blackmagic Design all have a version.
When 32-bit float recording is combined with multiple analog to digital converters it is the audio world’s version of lossless compressed RAW – where no matter how high or low the input gain levels are set, the audio will virtually never clip and will still be useable.
Imagine screaming into a microphone as loud as you can and then in your DAW lowering the level to a normal volume as if you recorded it correctly on the day. Mind you, you get to do this without any added noise or distortion to the audio. With 32-bit float recording, the dynamic range is about 1528 dB and about +770 dBFS. Meaning, even if you record at a very low level you can still raise the audio to a proper volume. Yes. It’s. Awesome.
Is 32-bit float recording new?
It’s not new but 24-bit 48 kHz BWAV files have been the industry standard in the professional audio community for a long time. Most major motion pictures and television programs are recorded 24-bit 48 kHz or 48.048 kHz. We’re seeing an increase in 32-bit float recording because the advancement in technology and more DAWs are now supporting it.
Who is 32-bit float recording good for?
Technically, anyone. But if you don’t have extensive knowledge in setting proper input levels, 32-bit float is going to help you achieve useable levels in post. Now keep in mind setting proper audio levels is vastly different than understanding proper mic placement or what mics to choose or understanding timecode workflow or dampening noise or reflections.
32-bit float should never be a replacement for a production sound mixer. However, if you’re a one-man-band, YouTube creator, a filmmaker starting out or even a pro, it’s a helpful option. Before recording 32-bit float make sure the production is on board and supports it and make sure your own editing program or DAW supports it.
 Zoom F6
Hey, the Zoom F6 has 32-bit float recording too
Yes, that’s correct. Unfortunately, this isn’t going to be a side by side comparison. What can be shared is this: The difference between the Sound Devices and Zoom models will be in how the preamp processes the audio, the equivalent input noise, and the physical mechanics and overall features of each device. These things make us lean one way or another and can be completely subjective.
On the technical side and without formal testing, the equivalent input noise on the Sound Devices MixPre II has a -130 dBu and Zoom F6 has a -127 dBu. Does -3 dBu make a difference?
Maybe when it comes to using dynamic mics or maybe not. Either way, 32-bit float recording is nothing without dual AD converters. It’s the combination of these two that creates a wide dynamic range. Without both working together, 32-bit float files would clip just like any 16-bit or 24-bit recording. With that said, let’s dive into the MixPre II series.

What’s new with MixPre II
Sound Devices developed the original MixPre series in 2017 as a way to introduce their technology to a wider audience. The company introduced three different models, the main difference being the number of inputs: 3, 6, or 10. Each device is a mixer, recorder and USB interface in one. Now in its second generation, MixPre II is further blurring the line among its professional-grade series mixer recorders.
For this review, Sound Devices sent out a MixPre-3 II which is a three-input device. Thoughts are based on this model alone. Plus, everything in this article relates to software version 5.01. Future software or hardware updates could affect opinions.
An overview of the new features found on the Mix Pre II:
- 32-bit float recording
- Record up to 192 kHz
- Internal LTC Timecode Generation and Output
- Adjustable Limiters
- USB-C Output Control
- USB-A Hub Support
- Auto-copy to USB-A
- 10-second pre-roll buffer
 MixPre II has three different operating modes: Basic, Advanced, Custom
MixPre II has three modes: Basic, Advanced and Custom. Basic slims down the menu for beginners. Advanced opens up all settings and Custom allows you to customize the menu options between Basic and Advanced. You can change this under Menu>System>Mode.
My suggestion would be to start using the unit in Advanced mode right out of the box. Get to know the device inside and out. Learn and understand all of its functionality then customize it based on your needs. Even if you’re only recording a single microphone, where Basic mode does an ok job, Advanced mode gives you everything at your fingertips.
Basic Mode
Basic mode records a fixed sample rate of 24-bit 48 kHz and only the left/right mix. However, it does provide pre-roll recording up to 10 seconds, record trigger options, timecode, tone and USB-A file transfer (more on that later). Inside each channel menu, it limits you to four options: input selection, a basic left, right or center pan, phantom power and an on/off low cut filter. Basic mode also automatically sets limiters to Factory settings to prevent audio peaking. The channel knob also controls all the gain for the individual channel and overall mix.
Overall Gain Range Levels (off position included):
- Mic: -14 dB to 96 dB
- Line: -60 dB to 50 dB
- Aux 1/2: -60 dB to 30 dB
- USB 1/2: -70 dB to 20 dB
Advanced mode
This is where the MixPre II shines. To start, input channels now have a dual gain stage. Each channel has separate input gain settings that can be adjusted in the channel menu by pressing in the channel knob. In Advanced Mode, the channel knob now controls the post-fade mix level with a range of -50 dB to 20 dB. Meaning, your isolated tracks (ISOs) can be recorded at one level and then your mix at a different level.
Individual Input Gain Levels (off position included):
- Mic: 6 dB to 76 dB
- Line: -20 dB to 30 dB
- Aux 1/2: -10db to 30 dB
- USB 1/2: -20 dB to 30 dB
Besides the new gain structure there a ton of other options for each input channel. Panning now lets you dial in the exact position from left, right or center (1-16). Pressing the Arm button allows you to record or not record an ISO track to the SD card. Solo allows you to hear only the selected input through headphones. When activated the channel knob blinks orange. Low Cut now allows you to choose between 40, 80, 120 and 160Hz. There’s also a delay option up to 30 milliseconds, you can link channels as stereo or mid-side pair and there’s an option for phase inversion. And those are just options for the input channels. The system itself allows for even more customization.
Let’s say you only want to record one channel and not the mix. There’s an option to turn off the mix. Menu>Record>Rec L,R> Off. You can also arm only the left or right mix buses. You can also link them and adjust the gain setting from -30 dB to 0 dB.
Advanced mode lets you choose the sample rate: 44.1, 47.952, 48, 48.048, 96 and 192 kHz. Output control is also activated allowing to choose what audio can be sent through its stereo output found on the left side of the device. The headphone output has more options with four programmable presets. The limiters can now be customized through ratio, release and threshold settings.
 32-bit recording is only available in Advanced mode
32-bit float recording is available only in Advanced mode. When selected under Menu>Record>Bit Depth the device will prompt you with an “ok” screen and the unit will restart. It took about 10 seconds for the MixPre-3 II to restart. When you switch the bit depth back to 16 or 24-bit, the unit will restart again. In 32-bit float, the limiter menu is removed as there is no reason to place limiters with 32-bit float recordings.
There’s a lot in Advanced mode. It can be intimidating but it’s all of it worth knowing and understanding. Definitely take the time to review the manual and play around.
MixAssist
With software version 5.01 the MixPre and MixPre II are compatible with MixAssist that was only previously available on the 6-, 7-, and 8-Series. The automixer, according to Sound Devices, uses algorithms to reduce noise and phase artifacts, including Noise Adaptive Threshold, MaxBus, Last Mic Lock-on, Off-Attenuation, and NOMA (Number of Open Mic Attenuator). It’s available as an add-on plug-in for $99. After downloading the plugin to the device you can find the MixAssist settings in the Input menu. It’s worth noting the Zoom F6 comes standard with an automix feature.
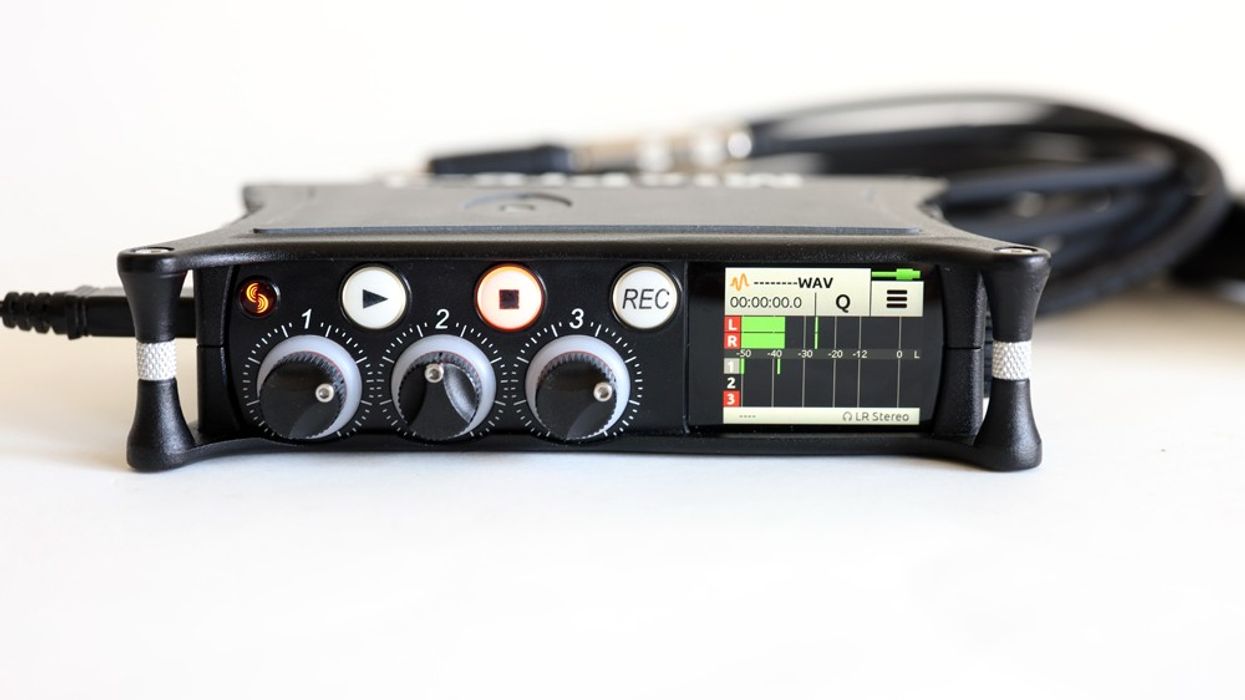
 Touchscreen is fast and responsive
While small, the touchscreen is very efficient and intuitive. It displays audio meters, power status, recording rate, timecode, file name and has a cue marker icon “Q” to lay markers during recording and playback. You can also toggle through three different display screens. One that shows only the left and right mix track, another that shows both the mix and isolated tracks and the third that shows the mix track and USB inputs 1 and 2.
The audio meters are broken up in an easy to read color-coding system. Green up to -20 dbFS, yellow up to -12 dbFS and then red to 0 dbFS. They’re accurate as well. When testing a recorded -20 dB tone inside Audacity it lined up exactly to -20 dB in the DAW. Another -30 dB speaking test provided similar results.
One thing tricky was figuring out how to access recorded files. Where are they? To access the list touch the file list icon which is denoted with an orange audio wave logo in the top left corner. For some reason, I thought it was just a logo (shrug emoji).
Also of note when adjusting menu settings like gain or input you can use the headphone knob for a faster selection. But if you accidentally touch the headphone knob before entering the menu setting it will adjust the headphone gain like it’s supposed to. You’ll have to wait a few milliseconds for it to clear the screen before moving forward.
Everything else about the menu was well laid out and if you have preferred settings you can save them to four internal presets or to an SD card.
 Single SD card slot, plus hex key for mounting
SD Media
There's a single memory card slot for an SD, SDHC, or SDXC card up to 512GB of storage is on the rear of the device. SD cards must meet or exceed class 10 speeds and are formatted in exFAT. Note exFAT is not compatible with Windows XP or Mac OS X 10.6.4 or lower. Files are maxed at 4GB before being continued to a new file that can be easily synced in post.
USB-A / USB-C / USB Audio Interface
Note this is as of software version 5.01.
USB-A
The USB-A supports 3rd party devices like keyboards or controllers. It can also simultaneously support multiple USB-A devices using a USB-A hub.
The input allows for auto-copying of files from the SD card to a USB thumb drive. It acts as a dual card slot. After hitting stop on a recording, the file will automatically back up to the thumb drive. The record button will flash red until the process is complete. Auto-copy can be temporarily stopped on long transfers by hitting the stop key. A prompt will appear to “suspend auto-copy.” Then the auto-copy function will automatically resume on the next recording.
It’s worth noting the USB-A input does not record USB-A style microphones.
 Single USB-A and USB-C connections
USB-C
The USB-C port does three things: provide power, it can connect to a computer as a USB-C audio interface or it can connect to a computer to transfer files from the SD card.
MixPre II can record and stream audio to a USB host or record the USB audio stream out of a computer directly to its SD card. Using the MixPre II as an audio interface is ideal for podcasters with contributors in remote locations as you can setup a mix-minus where the remote contributor hears the program mix but not their own voice. While the MixPre II has low latency you also monitor with zero latency.
There’s flexible USB output routing where you can select which channels are sent via USB to a computer. Isolated channels can be sent pre- or post-fade. The MixPre-3 II is a 5-in, 2-out USB audio interface.
I didn’t have a USB-A to USB-C adapter (or dongle) to test if you can record USB-A style microphones through the USB-C. If it can we will update this post in the future.
Timecode
MixPre II devices have standard timecode/drop-frame options. You can select between free run, time of day, rec run, through the auxiliary input or via micro-HDMI. You can also jam timecode or manually set it. Standard frame rates included are 23.98, 24, 25, 29.97nd, 29.97dF,30, and 30 dF. The MixPre-10 II has a BNC option for timecode.
Build
The external build quality of the MixPre and MixPre II are identical. The body is made from die-cast aluminum that’s rugged enough for everyday use and can withstand the occasional drop. The top and bottom have a rubber inlay to provide a secure mounting surface for cameras or tripods. The bottom has a female 1/4-20” and the top has a retractable 1/4-20” that can be extracted using the provided hex key conveniently located on the rear of the unit.
 Smaller lenses have plenty of operating clearance
 With larger lenses be sure to test the fit

Next to aux input is a 3.5mm headphone output and an encoder knob used to adjust the headphone volume. The knob also navigates the menu and has press-button action for selecting.
There’s also a micro-HDMI input that provides start-stop commands and timecode from compatible cameras. There are two record trigger options under Menu>Record>Record Trigger>. Select the HDMI flag for Sony, Panasonic, Nikon, Canon, and Blackmagic cameras and HDMI Fujifilm for Fujifilm cameras. There’s an option to trigger recording through timecode but that’s only available on the MixPre-10 II.
On the MixPre-3 II, the left side has two balanced XLR inputs with Neutrik connector (NC3FAAH1). Note these are not combo XLR / 1/4” inputs. To use 1/4" connectors you’ll need adapters or consider the MixPre-6 II or -10 II which do have the combo inputs. When asking Sound Devices why the MixPre-3 doesn’t have combo inputs, Paul Isaacs, the Director of Product Management and Design, said, “We wanted to keep the MixPre-3 and MixPre-3 II as small and portable as possible. Combo jacks take up more internal room in the unit." Also on the left side is an unbalanced 3.5mm stereo line out, USB-A, USB-C (more on those later) and the power switch.
One thing to note since the bodies are identical the only way to tell the difference between them without powering on and going into the System>Version menu is a small sticker located on the rear. So if you happen to be working with both models marking one with tape should be helpful.

Power Options
AC
MixPre-3 II and -6 II models include an AC wall adapter in the box that connects through USB-C. MixPre-10 II is powered through a dedicated 4-pin hirose connection on the rear of the unit. It also comes with its power supply in the box. Also included in the box are adapters for Euro, UK, and Australia outlets.
Battery
There are battery sled options depending on the model:
Four AA battery sled (MX-4AA): -3 II or -6 II
Eight AA battery sled (MX-8AA): -3 II, -6 II or -10 II
Sony-type L-Mount (MX-LMount): -3 II, -6 II or -10 II
The four AA battery sled is included with-3 II and -6 II models. The -10 II includes the eight. L-Mount is an optional accessory ($65 USD at publishing time) and can hold one or two L-Mount batteries which are hot-swappable.
For AA batteries Sound Devices recommends Energizer Ultimate Lithium over alkaline as alkaline is only going to get you about 30 minutes of power. You can also use Nickel Metal Hydride (NiMH) rechargeable batteries which are preferred to lithium or alkaline. For extended shoots, L-mount is going to be your best option. If you’re using the MixPre-10 II you can connect NP1 style batteries through the hirose connector. Under Menu>Power you can designate the battery type alkaline, NiMH or L-mount.
Pro Tip: To conserve battery power under Menu>System>Brightness lower the LCD and LED brightness to 1. Also, turn off all the input channels that are not in use. Do this by pushing in the gain knob and changing the Menu>Input to off. And under Menu>Inputs turn Aux In Mode to off. Finally, make sure Bluetooth under Menu>System is off too.
USB-C
Power can be sent through the USB-C connector with the included USB-C to USB-C cable when it is connected to a computer or AC wall adapter. You can also connect a USB-C to USB-A cable to a computer but the unit will enter a low power state losing functionality by reducing 48V on channels, dim the LCD/LEDs, disable the USB-A and micro-HDMI ports. So it’s still usable but dependent on what you need. If your computer doesn’t have USB-C there’s an optional accessory (MX-USBY) which is a dual USB-A (one for power, one for data) to USB-C.
Notes on Power
It’s worth noting that if you lose power you will lose the current audio recording. You must hit stop for the recording to save properly. There’s no safety net like something you would find on a Zaxcom product using MARF recording, but again, price point.
If AC and battery power are both connected, AC will take priority on all models. The one exception is if the USB-C power doesn’t meet the full power requirements it will lose the same aforementioned functionality. An underpowered or low power source is indicated when the power icon in the top right is orange. Green indicates full power and red flashing indicates "critical" battery. Underpowered mode is only available on -3 II and -6 II models. The MixPre-10 II does not have underpowered functionality. It must be fully powered all the time.
Workflow Thoughts
Learning the MixPre II took a few days. Specifically speaking on the MixPre-3 II, I found everything easy even in Advanced mode. If I did have a question the fully documented manual provided the answer. While I haven’t fully examined all the output routing I find its USB interface workflow very capable for any podcast environment.
Simple podcast setup:
- Two people speaking in the same room
- Audio clips being played from a computer (heard by both speaker and being recorded to the Mix Pre II)
Input both speaking mics into XLR inputs 1 input 2. For the audio clips attach one end of a 3.5mm to 3.5mm stereo cable from the headphone output of the computer to the 3.5mm aux/mic input on the MixPre-3 II. On the MixPre-3 send it mic level. Then split the headphone output of the MixPre-3 II using a headphone splitter like a Belkin Rockstar but any 3.5mm splitter should do. This setup will allow each input to have its own ISO and everyone will be able to hear the audio clips being played by the computer through the headphones.
Rerecord and mix an already recorded track
Another thing great about the MixPre II is the ability to re-record a track. After selecting a track in Advanced mode the headphone knob allows you to edit it under Re-record LR menu. The file will play on the device where you can adjust the input level of the track. It will record to a new file with “R_” in front of the file name.
Everything else about the MixPre II was smooth. The headphone knob, the smaller XLR latches to remove cables, the buttons, the input knobs, the battery sled. I found no problems and got used to its smaller size.

What Can Be Improved
- A dedicated hirose connector or USB-C for power on the -3 II and -6 II models. There are a couple of reasons why but the main one being if using the USB-C connected to a computer that doesn’t supply enough power, you’re screwed.
- On the MixPre-3 II (or -6, -10). When using all three XLR inputs allow the auxiliary/mic input to create a fourth ISO track. Make the input setting a “set and store” option where you use an input to set the levels and save it. Then you can switch over to the XLR input and adjust it normally. 4 ISOs. It doesn’t even need to be part of the mix, but if it can, even better.
- Put XLR/1/4” combo inputs on the MixPre-3 II. A small increase in size is better than carrying around adapters.
- A way to delete internal menu setting presets instead of just overwriting them.
- Ability to record USB-A style microphones through the USB-A input. e.g. RODE NT-USB, Blue Yeti, Audio Technica AT2020USB.
- Ability to turn on/off auto-copy from being automatic.
- Record 32-bit and 24-bit files simultaneously
- Include the MX-USBY Dual USB-A to USB-C cable
- Include both the 4AA and 8 AA battery sleds for -3 II and -6 II
Conclusion
The MixPre II is worth the cost. Depending on your audio needs it’s going to be a great long term match for a lot of recordists and creators. It’s robust enough for everyday use on large projects but simple enough for a quick start directly out of the box. It has enough gain for podcasters using Shure SM7b or Electro-Voice RE-20 mics without needing a Cloudlifter. With the addition of MixAssist and improved USB output routing, it touts a lot of power.
Speaking to the MixPre-3 II it is really small. However, you do need to consider its ergonomics. If you plan on mounting it to a camera depending on the lens it could get in the way.
Future proofing is always a consideration when buying gear. If you plan on becoming a full-time sound mixer or are one already, the MixPre II is a good starter device or as a secondary unit for low maintenance days.
When comparing the MixPre II to Sound Devices professional grade 6- or 8-Series there are noticeable differences including processing power, track count, and overall build. You’re not going to find plastic trim knobs on the 6- or 8-Series. For those with a 6- or 8-Series recorders Sound Devices said 32-bit float recording could be a future possibility.
Plugins & Apps
Ambisonics Plugin – $49 USD – adds ambisonic and binaural recording/playback
MixAssist Plugin - $99 USD – enables the automix feature
Musician Plugin – $99 USD – introduces music style DAW functionality
Wingman App – FREE – tablet or smartphone monitoring, record trigger
Price & Availability
All three models are available now.
MixPre- 3 II – $649 USD
MixPre-6 II – $849 USD
MixPre-10 II – $1,399 USD