And there are huge differences between lighting inanimate objects, reflective materials, animals, and humans in different locations or small spaces. The various lighting styles have the ability to greatly alter the moods of scenes.
Another thing you need to know is how light can affect the appearance of actors' faces. In one of their recent videos, Aputure tackles the basics of shaping faces with different lighting styles and tools.
Director of photography William Hellmuth walks viewers through the steps of three lighting techniques.
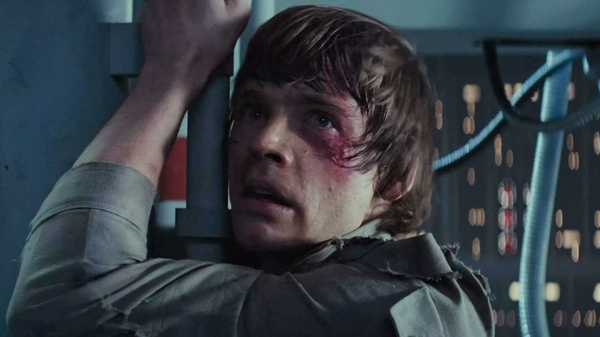
How to Far Side Key
Far side key refers to key lighting the side of the actor's face that is away from the camera. This is one of the most common and easiest ways to light actors.
Hellmuth used a variety of lights and gels to achieve his perfect far side key lighting.

A 300d served as his main light, and he used a mix of 4x4 opal diffusion gels, color temperature straw (CTS) gels, and CTO gels to achieve different color temperatures. He lit the far background in a warm light while also allowing cool natural light to come through the window in his scene.
If you're a newbie to the world of gels, check out our guide to using gels.
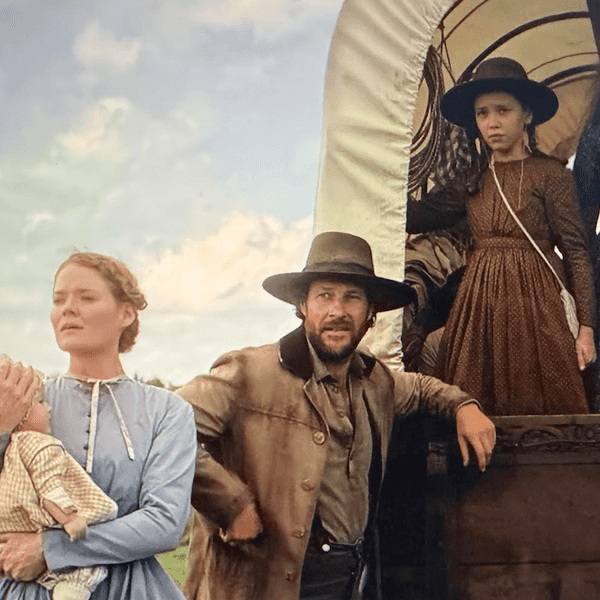
How to Near Side Key with Bottom Lighting
Near side key is generally viewed as a flatter lighting technique that creates fewer shadows and is often used as "beauty lighting." Here, Hellmuth's script called for a practical, naked bulb in front of and below the actors, so he had to shoot into the light source and find a way for it to look good.
He bounced a 120d II through CTS and CTO gels, then diffused that light through an 8x8 cloth. The foam beadboard was placed at ground level and angled to mimic the bulb as a source.
Hellmuth also noted that it's important not to bring a bottom-side key too close to an actor's face, otherwise the light will start creating extreme shadows.
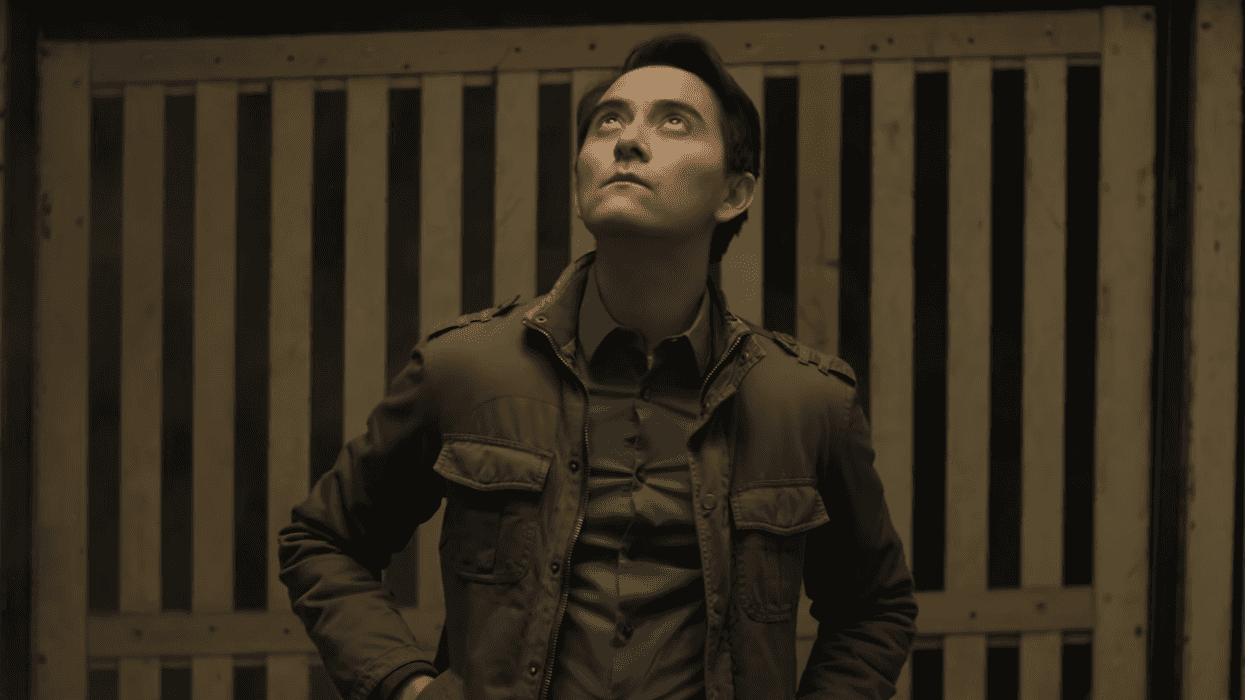
How to Top Light
Hellmuth used Aputure's new spotlight mount to direct his 300d straight down, then added fill light with a diffused light source in front of the actor and a bounce card at his feet.

You can also opt to diffuse the top light through a large piece of unbleached muslin, which will diffuse the light everywhere and create a softer-looking ambient light.
Hellmuth's Overall Tips for Lighting Design
First, let the environment and story inform your lighting design. What do you want to say with the light? What mood are you creating? How do you want to portray the characters and their emotions through lighting?
Second, pay attention to how shadows fall on the actors' faces. Some types of lighting are going to carve out faces in unflattering ways. Perhaps this is your goal, if you're shooting a horror film and want a character to look scary.
Third, trust the script to tell you where your key lights should be placed, and be willing to experiment with different placements. Maybe the story calls for a nontraditional light source. Play around with it!

What's next? Now that you know some ways to light faces, check out some of our other lighting resources.
We've got some great coverage out of NAB 2019 on the latest LED lights, as well as tips for bouncing light and how best to use a 5-in-1 reflector.
Are you ready to put together your own light kit? Trying building one yourself, or check out an example of a low-budget option. You can also use your smartphone as a lighting tool!
Source: Aputure