U.S. DRAMATIC COMPETITION

Atropia
Courtesy of Sundance Institute
The U.S. Dramatic Competition offers Festivalgoers a first look at the world premieres of groundbreaking new voices in American independent film. Films that have premiered in this category in recent years include Dìdi (弟弟), A Real Pain, In The Summers, Nanny, CODA, Minari, Never Rarely Sometimes Always, The Farewell, Clemency, Eighth Grade, and Sorry to Bother You.
Atropia / U.S.A. (Director and Screenwriter: Hailey Gates, Producers: Naima Abed, Emilie Georges, Luca Guadagnino, Lana Kim, Jett Steiger) — When an aspiring actress in a military role-playing facility falls in love with a soldier cast as an insurgent, their unsimulated emotions threaten to derail the performance. Cast: Alia Shawkat, Callum Turner, Chloë Sevigny, Tim Heidecker, Jane Levy. World Premiere. Available online for Public.
Bubble & Squeak/ U.S.A. (Director and Screenwriter: Evan Twohy, Producers: Christina Oh, Steven Yeun) — Accused of smuggling cabbages into a nation where cabbages are banned, Declan and Delores must confront the fragility of their new marriage while on the run for their lives. Cast: Himesh Patel, Sarah Goldberg, Steven Yeun, Dave Franco, Matt Berry. World Premiere. Available online for Public.
Bunnylovr / U.S.A. (Director and Screenwriter: Katarina Zhu, Producers: Tristan Scott-Behrends, Ani Schroeter, Rhianon Jones, Roger Mancusi, Rachel Sennott) — A drifting Chinese American cam girl struggles to navigate an increasingly toxic relationship with one of her clients while rekindling her relationship with her dying estranged father. Cast: Katarina Zhu, Rachel Sennott, Austin Amelio, Perry Yung, Jack Kilmer. World Premiere. Available online for Public.
Love, Brooklyn/ U.S.A. (Director: Rachael Abigail Holder, Screenwriter: Paul Zimmerman, Producers: André Holland, Kate Sharp, Patrick Wengler, Maurice Anderson, Liza Zusman) — Three longtime Brooklynites navigate careers, love, loss, and friendship against the rapidly changing landscape of their beloved city. Cast: André Holland, Nicole Beharie, DeWanda Wise, Roy Wood Jr., Cassandra Freeman, Cadence Reese. World Premiere. Available online for Public.
Omaha / U.S.A. (Director: Cole Webley, Screenwriter: Robert Machoian, Producer: Preston Lee) — After a family tragedy, siblings Ella and Charlie are unexpectedly woken up by their dad and taken on a journey across the country, experiencing a world they’ve never seen before. As their adventure unfolds, Ella begins to understand that things might not be what they seem. Cast: John Magaro, Molly Belle Wright, Wyatt Solis, Talia Balsam. World Premiere. Available online for Public.

Plainclothes
Courtesy of Sundance Institute
Plainclothes/ U.S.A. (Director and Screenwriter: Carmen Emmi, Producers: Colby Cote, Arthur Landon, Eric Podwall, Vanessa Pantley) — A promising undercover officer assigned to lure and arrest gay men defies orders when he falls in love with a target. Cast: Tom Blyth, Russell Tovey, Maria Dizzia, Christian Cooke, Gabe Fazio, Amy Forsyth. World Premiere. Available online for Public.
Ricky / U.S.A. (Director, Screenwriter, and Producer: Rashad Frett, Screenwriter: Lin Que Ayoung, Producers: Pierre M. Coleman, Simon TaufiQue, Sterling Brim, Josh Peters, DC Wade, Cary Fukunaga) — Newly released after being locked up in his teens, 30-year-old Ricky navigates the challenging realities of life post-incarceration, and the complexity of gaining independence for the first time as an adult. Cast: Stephan James, Sheryl Lee Ralph, Titus Welliver, Maliq Johnson, Imani Lewis, Andrene Ward-Hammond. World Premiere. Available online for Public.
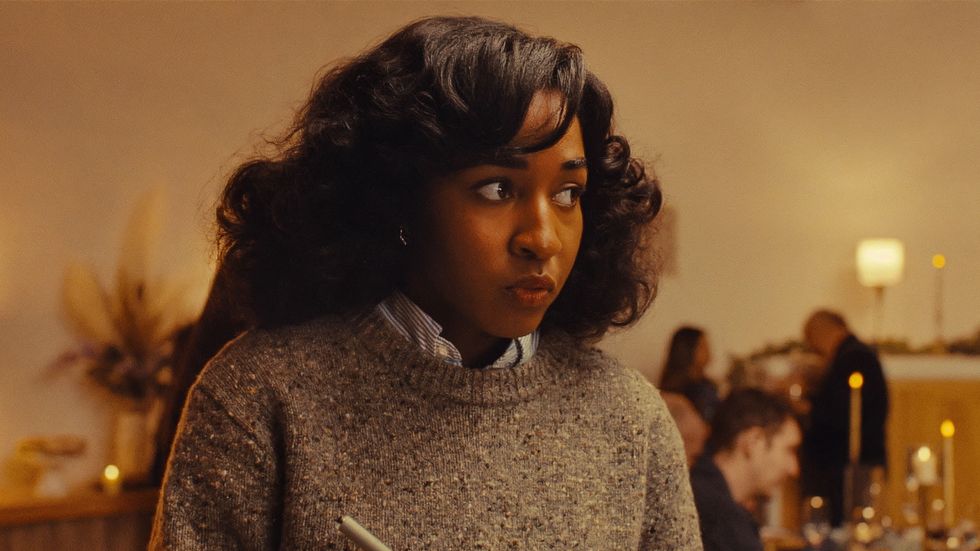
Sorry, Baby / U.S.A. (Director and Screenwriter: Eva Victor, Producers: Adele Romanski, Mark Ceryak, Barry Jenkins) — Something bad happened to Agnes. But life goes on… for everyone around her, at least. Cast: Eva Victor, Naomi Ackie, Lucas Hedges, John Carroll Lynch, Louis Cancelmi, Kelly McCormack. World Premiere. Available online for Public.
Sunfish (& Other Stories on Green Lake) / U.S.A. (Director, Screenwriter, and Producer: Sierra Falconer, Producer: Grant Ellison) — Lives intertwine around Green Lake as a girl learns to sail, a boy fights for first chair, two sisters operate a bed-and-breakfast, and a fisherman is after the catch of his life. Cast: Maren Heary, Jim Kaplan, Karsen Liotta, Dominic Bogart, Tenley Kellogg, Emily Hall. World Premiere. Available online for Public.
Twinless/ U.S.A. (Director, Screenwriter, and Producer: James Sweeney, Producer: David Permut) — Two young men meet in a twin bereavement support group and form an unlikely bromance. Cast: Dylan O’Brien, James Sweeney, Lauren Graham, Aisling Franciosi, Tasha Smith, Chris Perfetti. World Premiere. Available online for Public.
U.S. DOCUMENTARY COMPETITION

Andre is an Idiot
Courtesy of Sundance Institute
The U.S. Documentary Competition offers Festivalgoers a first look at world premieres of nonfiction American films illuminating the ideas, people, and events that shape the present day. Films that have premiered in this category in recent years include Daughters, Sugarcane, Porcelain War, Going to Mars: The Nikki Giovanni Project, Navalny, Fire of Love, Summer of Soul (…Or, When the Revolution Could Not Be Televised), Boys State, Crip Camp: A Disability Revolution, Knock Down the House, One Child Nation, American Factory, Three Identical Strangers, and On Her Shoulders.
Andre is an Idiot/ U.S.A. (Director: Anthony Benna, Producers: Andre Ricciardi, Tory Tunnell, Joshua Altman, Stelio Kitrilakis, Ben Cotner) — Andre, a brilliant idiot, is dying because he didn’t get a colonoscopy. His sobering diagnosis, complete irreverence, and insatiable curiosity, send him on an unexpected journey learning how to die happily and ridiculously without losing his sense of humor. World Premiere. Available online for Public.
Life After / U.S.A. (Director: Reid Davenport, Producer: Colleen Cassingham) — In 1983, a disabled Californian woman named Elizabeth Bouvia sought the “right to die,” igniting a national debate about autonomy, dignity, and the value of disabled lives. After years of courtroom trials, Bouvia disappeared from public view. Disabled director Reid Davenport narrates this investigation of what happened to Bouvia. World Premiere. Available online for Public.
Marlee Matlin: Not Alone Anymore / U.S.A. (Director and Producer: Shoshannah Stern, Producers: Robyn Kopp, Justine Nagan, Bonni Cohen) — In 1987, Marlee Matlin became the first Deaf actor to win an Academy Award and was thrust into the spotlight at 21 years old. Reflecting on her life in her primary language of American Sign Language, Marlee explores the complexities of what it means to be a trailblazer. World Premiere. Available online for Public.
The Perfect Neighbor/ U.S.A. (Director and Producer: Geeta Gandbhir, Producers: Nikon Kwantu, Alisa Payne, Sam Bisbee) — A seemingly minor neighborhood dispute in Florida escalates into deadly violence. Police bodycam footage and investigative interviews expose the consequences of Florida’s “stand your ground” laws. World Premiere. Available online for Public.
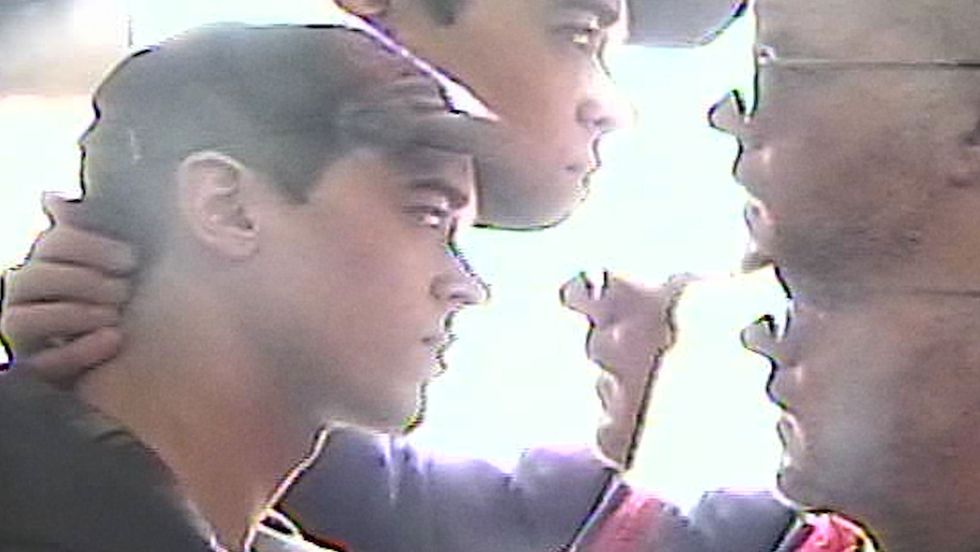
Predators / U.S.A. (Director and Producer: David Osit, Producers: Jamie Gonçalves, Kellen Quinn) — To Catch a Predator was a popular television show designed to hunt down child predators and lure them to a film set, where they would be interviewed and eventually arrested. An exploration of the scintillating rise and staggering fall of the show and the world it helped create. World Premiere. Available online for Public.

Seeds
Courtesy of Sundance Institute
Seeds/ U.S.A. (Director and Producer: Brittany Shyne, Producer: Danielle Varga) — An exploration of Black generational farmers in the American South reveals the fragility of legacy and the significance of owning land. World Premiere. Available online for Public.
Selena y Los Dinos / U.S.A. (Director: Isabel Castro, Producers: Julie Goldman, Christopher Clements, J. Daniel Torres, David Blackman, Simran Singh) — Selena Quintanilla — the “Queen of Tejano Music” — and her family band, Selena y Los Dinos, rose from performing at quinceañeras to selling out stadium tours. The celebration of her life and legacy is chronicled through never-before-seen footage from the family’s personal archive. World Premiere. Available online for Public.
Speak. / U.S.A. (Directors and Producers: Jennifer Tiexiera, Guy Mossman, Producer: Pamela Griner) — Five top-ranked high school oratory students spend a year crafting spellbinding spoken word performances with the dream of winning one of the world’s largest and most intense public speaking competitions. World Premiere. Available online for Public.
Sugar Babies / U.S.A. (Director and Producer: Rachel Fleit, Producers: Mickey Liddell, Pete Shilaimon, Mehrdod Heydari) — Autumn is an enterprising college scholarship recipient and burgeoning TikTok influencer. Part of a close circle of friends growing up poor in rural Louisiana, she is determined to overcome the struggles and barriers defining them. Faced with limited minimum wage job options, Autumn devises an online sugar baby operation. World Premiere. Available online for Public.
Third Act/ U.S.A. (Director and Producer: Tadashi Nakamura, Producer: Eurie Chung) — Generations of artists call Robert A. Nakamura “the godfather of Asian American media,” but filmmaker Tadashi Nakamura calls him Dad. Robert’s diagnosis of Parkinson’s disease leads to an exploration of art, activism, grief, and fatherhood. World Premiere. Available online for Public.
WORLD CINEMA DRAMATIC COMPETITION

DJ Ahmet
Courtesy of Sundance Institute
These narrative feature films from emerging talent around the world offer fresh perspectives and inventive styles. Films that have premiered in this category in recent years include Girls Will Be Girls, Sujo, Scrapper, Mami Wata, Hive, The Souvenir, The Guilty, Monos, Yardie, The Nile Hilton Incident, and Second Mother.
Brides/ U.K. (Director: Nadia Fall, Screenwriter: Suhayla El-Bushra, Producers: Nicky Bentham, Marica Stocchi) — Two teenage girls in search of freedom, friendship, and belonging run away from their troubled lives with a misguided plan of traveling to Syria. Cast: Ebada Hassan, Safiyya Ingar, Yusra Warsama, Cemre Ebuzziya, Aziz Capkurt. World Premiere. Available online for Public.
DJ Ahmet/North Macedonia, Czech Republic, Serbia, Croatia (Director and Screenwriter: Georgi M. Unkovski, Producers: Ivan Unkovski, Ivana Shekutkoska) — Ahmet, a 15-year-old boy from a remote Yuruk village in North Macedonia, finds refuge in music while navigating his father’s expectations, a conservative community, and his first experience with love — a girl already promised to someone else. Cast: Arif Jakup, Agush Agushev, Dora Akan Zlatanova, Aksel Mehmet, Selpin Kerim, Atila Klince. World Premiere. Available online for Public.
LUZ /Hong Kong, China (Director, Screenwriter, and Producer: Flora Lau, Producers: Yvette Tang, Joseph Sinn Gi Chan, Stephen Lam) —In the neon-lit streets of Chongqing, Wei desperately searches for his estranged daughter Fa, while Hong Kong gallerist Ren grapples with her ailing stepmother Sabine in Paris. Their lives collide in a virtual reality world, where a mystical deer reveals hidden truths, sparking a journey of discovery and connection. Cast: Isabelle Huppert, Sandrine Pinna, Xiao Dong Guo, Lu Huang, David Chiang, En Xi Deng. World Premiere. Available online for Public.
Sabar Bonda (Cactus Pears) / India, U.K., Canada (Director and Screenwriter: Rohan Parashuram Kanawade, Producers: Neeraj Churi, Mohamed Khaki, Kaushik Ray, Hareesh Reddypalli, Naren Chandavarkar, Sidharth Meer) — Anand, a 30-something city dweller compelled to spend a 10-day mourning period for his father in the rugged countryside of western India, tenderly bonds with a local farmer struggling to stay unmarried. As the mourning ends, forcing his return, Anand must decide the fate of his relationship born under duress. Cast: Bhushaan Manoj, Suraaj Suman, Jayshri Jagtap. World Premiere. Available online for Public.
Sauna/ Denmark (Director and Screenwriter: Mathias Broe, Screenwriter: William Lippert, Producer: Mads-August Hertz) — Johan thrives as a gay man in Copenhagen, enjoying endless bars, parties, and casual flings. Everything changes when he meets William, a transgender man, and falls into a deep love that defies societal norms around gender, identity, and relationships. Cast: Magnus Juhl Andersen, Nina Rask, Dilan Amin, Klaus Tange. World Premiere. Available online for Public.
Sukkwan Island / France (Director and Screenwriter: Vladimir de Fontenay, Producers: Carole Scotta, Eliott Khayat, Caroline Benjo) — On the remote Sukkwan Island, 13-year-old Roy agrees to spend a formative year of adventure with his father deep in the Norwegian fjords. What starts as a chance to reconnect descends into a test of survival as they face the harsh realities of their environment and confront their unresolved turmoil. Cast: Swann Arlaud, Woody Norman, Alma Pöysti, Ruaridh Mollica, Tuppence Middleton. World Premiere. Available online for Public.

The Things You Kill
Courtesy of Sundance Institute
The Things You Kill/Turkey, France, Poland, Canada (Director, Screenwriter, and Producer: Alireza Khatami, Producers: Elisa Sepulveda Ruddoff, Cyriac Auriol, Mariusz Włodarski, Michael Solomon) — Haunted by the suspicious death of his ailing mother, a university professor coerces his enigmatic gardener to execute a cold-blooded act of vengeance. Cast: Ekin Koç, Erkan Kolçak Köstendil, Hazar Ergüçlü, Ercan Kesal. World Premiere. Available online for Public.
Two Women/ Canada (Director: Chloé Robichaud, Screenwriter and Producer: Catherine Léger Producer: Martin Paul-Hus) — Violette is having a difficult maternity leave. Florence is dealing with depression. Despite their careers and families, they feel like failures. Florence’s first infidelity is a revelation. When having fun is far down the list of priorities, sleeping with a delivery guy could be revolutionary. Cast: Karine Gonthier-Hyndman, Laurence Leboeuf, Félix Moati, Mani Soleymanlou, Sophie Nelisse, Juliette Gariépy. World Premiere. Available online for Public.
The Virgin of Quarry Lake/Argentina, Spain, Mexico (Director: Laura Casabé, Screenwriter: Benjamin Naishtat, Producers: Tomas Eloy Muñoz, Valeria Bistagnino, Alejandro Israel, David Matamoros, Angeles Hernandez, Diego Martinez Ulanosky) — In 2001, three teenagers from the outskirts of Buenos Aires all fall in love with Diego. Natalia has always had the most chemistry with him, but when it seems inevitable that their friendship will turn into something more, the older and more experienced Silvia appears and soon captures Diego’s attention. Cast: Dolores Oliverio, Luisa Merelas, Fernanda Echevarría, Dady Brieva, Agustín Sosa. World Premiere. Available online for Public.
Where the Wind Comes From / Tunisia, France, Qatar (Director and Screenwriter: Amel Guellaty, Producers: Asma Chihoub, Karim Aitouna) — Alyssa, a rebellious 19-year-old girl, and her friend Mehdi, an introverted 23-year-old man, use their imagination to escape their unpromising reality. When they discover a contest in the south of Tunisia that may allow them to flee, they undertake a road trip regardless of the obstacles in their way. Cast: Eya Bellagha, Slim Baccar. World Premiere. Available online for Public.
WORLD CINEMA DOCUMENTARY COMPETITION

Coexistence, My Ass!
Courtesy of Sundance Institute
These nonfiction feature films from emerging talent around the world showcase some of the most courageous and extraordinary filmmaking today. Films that have premiered in this category in recent years include A New Kind of Wilderness, The Remarkable Life of Ibelin, The Eternal Memory, 20 Days in Mariupol, All That Breathes, Flee, Honeyland, Sea of Shadows, Shirkers, and Last Men in Aleppo.
2000 Meters to Andriivka / Ukraine (Director and Producer: Mstyslav Chernov, Producers: Michelle Mizner, Raney Aronson-Rath) — Amid the failing counteroffensive, a journalist follows a Ukrainian platoon on their mission to traverse one mile of heavily fortified forest and liberate a strategic village from Russian occupation. But the farther they advance through their destroyed homeland, the more they realize that this war may never end. World Premiere. Available online for Public.
Coexistence, My Ass!/ U.S.A., France(Director and Producer: Amber Fares, Screenwriters: Rachel Leah Jones, Rabab Haj Yahya, Producer: Rachel Leah Jones, Valérie Montmartin) — Comedian Noam Shuster Eliassi creates a personal and political one-woman show about the struggle for equality in Israel/Palestine. When the elusive coexistence she’s spent her life working toward starts sounding like a bad joke, she challenges her audiences with hard truths that are no laughing matter. World Premiere. Available online for Public.
Cutting Through Rocks (اوزاک یوللار) / Iran, Germany, U.S.A., Netherlands, Qatar, Chile, Canada (Directors and Producers: Sara Khaki, Mohammadreza Eyni) — As the first elected councilwoman of her Iranian village, Sara Shahverdi aims to break long-held patriarchal traditions by training teenage girls to ride motorcycles and stopping child marriages. When accusations arise questioning Sara’s intentions to empower the girls, her identity is put in turmoil. World Premiere. Available online for Public.
The Dating Game/ U.S.A., U.K., Norway (Director and Producer: Violet Du Feng, Producers: Joanna Natasegara, James Costa, Mette Cheng Munthe-Kaas) —In a country where eligible men greatly outnumber women, three perpetual bachelors join an intensive seven-day dating camp led by one of China’s most sought-after dating coaches in what may be their last-ditch effort to find love. World Premiere. Available online for Public.
Endless Cookie / Canada (Directors and Screenwriters: Seth Scriver, Peter Scriver, Producers: Daniel Bekerman, Chris Yurkovich, Alex Ordanis, Jason Ryle, Seth Scriver) — Exploring the complex bond between two half brothers — one Indigenous, one white — traveling from the present in isolated Shamattawa to bustling 1980s Toronto. World Premiere. Available online for Public.

GEN_
Courtesy of Sundance Institute
GEN_ / France, Italy, Switzerland (Director and Screenwriter: Gianluca Matarrese, Screenwriter: Donatella Della Ratta, Producers: Dominique Barneaud, Donatella Palermo, Alexandre Iordachescu) — At Milan’s Niguarda public hospital, the unconventional Dr. Bini leads a bold mission overseeing aspiring parents undergoing in vitro fertilization and the journeys of individuals reconciling their bodies with their gender identities. He navigates the constraints set by a conservative government and an aggressive market eager to commodify bodies. World Premiere. Available online for Public.
How to Build a Library / Kenya (Directors, Screenwriters, and Producers: Maia Lekow, Christopher King, Screenwriter: Ricardo Acosta) — Two intrepid Nairobi women decide to transform what used to be a whites-only library until 1958 into a vibrant cultural hub. Along the way, they must navigate local politics, raise millions for the rebuild, and confront the lingering ghosts of Kenya’s colonial past. World Premiere. Available online for Public.
Khartoum /Sudan, U.K., Germany, Qatar(Directors: Anas Saeed, Rawia Alhag, Ibrahim Snoopy Ahmad, Timeea Mohamed Ahmed, Phil Cox, Screenwriter: Phil Cox, Producers: Giovanna Stopponi, Talal Afifi) — Forced to leave Sudan for East Africa following the outbreak of war, five citizens of Khartoum — a civil servant, a tea lady, a resistance committee volunteer, and two young bottle collectors — reenact their stories of survival and freedom through dreams, revolution, and civil war. World Premiere. Available online for Public.
Mr. Nobody Against Putin/Denmark, Czech Republic (Director and Screenwriter: David Borenstein, Producer: Helle Faber) — As Russia launches its full-scale invasion of Ukraine, primary schools across Russia’s hinterlands are transformed into recruitment stages for the war. Facing the ethical dilemma of working in a system defined by propaganda and violence, a brave teacher goes undercover to film what’s really happening in his own school. World Premiere. Available online for Public.
Prime Minister/ U.S.A. (Directors: Michelle Walshe, Lindsay Utz, Producers: Cass Avery, Leon Kirkbeck, Gigi Pritzker, Rachel Shane, Katie Peck) — A view inside the life of former New Zealand Prime Minister Jacinda Ardern, capturing her through five tumultuous years in power and beyond as she redefined leadership on the world stage. World Premiere. Available online for Public.
NEXT

Obex
Courtesy of Sundance Institute
Pure, bold works distinguished by an innovative, forward-thinking approach to storytelling populate this program. Unfettered creativity promises that the films in this section will shape the greater next wave in global cinema. Films that have premiered in this category in recent years include Little Death, Seeking Mavis Beacon, KOKOMO CITY, A Love Song, RIOTSVILLE, USA, Searching, Skate Kitchen, A Ghost Story, and Tangerine.NEXT is presented by Adobe.
BLKNWS: Terms & Conditions / U.S.A. (Director, Screenwriter, and Producer: Kahlil Joseph, Screenwriters: Saidiya Hartman, Irvin Hunt, Producers: Onye Anyanwu, Amy Greenleaf, Nic Gonda) — Preeminent West African curator and scholar Funmilayo Akechukwu’s magnum opus, The Resonance Field, leads her to the heart of the Atlantic Ocean, drawing a journalist into a journey that shatters her understanding of consciousness and time. Cast: Shaunette Renée Wilson, Kaneza Schaal, Hope Giselle, Peter Hernandez, Penny Johnson Jerald, Zora Casebere. World Premiere. Fiction. Available online for Public.
By Design/ U.S.A. (Director and Screenwriter: Amanda Kramer, Producers: Miranda Bailey, Sarah Winshall, Natalie Whalen, Jacob Agger) — A woman swaps bodies with a chair, and everyone likes her better as a chair. Cast: Juliette Lewis, Mamoudou Athie, Melanie Griffith, Samantha Mathis, Robin Tunney, Udo Kier. World Premiere. Fiction. Available online for Public.
East of Wall/ U.S.A. (Director, Screenwriter, and Producer: Kate Beecroft, Producers: Lila Yacoub, Melanie Ramsayer, Shannon Moss) — After the death of her husband, Tabatha — a young, tattooed, rebellious horse trainer — wrestles with financial insecurity and unresolved grief while providing refuge for a group of wayward teenagers on her broken-down ranch in the Badlands. Cast: Tabatha Zimiga, Porshia Zimiga, Scoot McNairy, Jennifer Ehle. World Premiere. Fiction. Available online for Public.
Mad Bills to Pay (or Destiny, dile que no soy malo)/ U.S.A. (Director and Screenwriter: Joel Alfonso Vargas, Producer: Paolo Maria Pedullà) — Rico’s summer is a mix of chasing girls and hustling homemade cocktails out of a cooler on Orchard Beach, the Bronx. But when Destiny, his teenage girlfriend, crashes at his place with his family, it’s only a matter of time before his carefree days come spiraling down. Cast: Juan Collado, Destiny Checo, Yohanna Florentino, Nathaly Navarro. World Premiere. Fiction. Available online for Public.
OBEX / U.S.A. (Director, Screenwriter, and Producer: Albert Birney, Screenwriter and Producer: Pete Ohs, Producers: Emma Hannaway, James Belfer) — Conor Marsh lives a secluded life with his dog, Sandy, until one day he begins playing OBEX, a new, state-of-the-art computer game. When Sandy goes missing, the line between reality and game blurs and Conor must venture into the strange world of OBEX to bring her home. Cast: Albert Birney, Callie Hernandez, Frank Mosley. World Premiere. Fiction. Available online for Public.
Rains Over Babel / Colombia, U.S.A., Spain (Director, Screenwriter, and Producer: Gala del Sol, Producers: H.A Hermida, Ana Cristina Gutiérrez, Andrés Hermida, Natalia Rendón Rodríguez) — A group of misfits converges at Babel, a legendary dive bar that doubles as purgatory, where La Flaca — the city’s Grim Reaper — presides. Here, souls gamble years of their lives with her, daring to outwit Death herself. Cast: Saray Rebolledo, Felipe Aguilar Rodríguez, John Alex Castillo, William Hurtado, Santiago Pineda, Celina Biurrun. World Premiere. Fiction. Available online for Public.
Serious People/U.S.A. (Directors and Screenwriters: Pasqual Gutierrez, Ben Mullinkosson, Producers: Ryan Hahn, Teddy Lee, Laurel Thomson) — A successful music video director and expectant father pushes his work-life balance to the extreme as he hires a doppelgänger to work in his stead. Cast: Pasqual Gutierrez, Christine Yuan, Miguel Huerta, Raul Sanchez. World Premiere. Fiction. Available online for Public.
Zodiac Killer Project/ U.S.A., U.K. (Director and Producer: Charlie Shackleton, Producers: Catherine Bray, Anthony Ing) — Against the backdrop of sunbaked parking lots, deserted courthouses, and empty suburban homes — the familiar spaces of true crime, stripped of all action and spectacle — a filmmaker describes his abandoned Zodiac Killer documentary and probes the inner workings of a genre at saturation point. World Premiere. Documentary. Available online for Public.
PREMIERES

Move Ya Body: The Birth of House
Courtesy of Sundance Institute
This showcase of world premieres presents highly anticipated films on a variety of subjects in both fiction and nonfiction. Fiction films that have screened in Premieres include A Different Man, Past Lives, Passages, Promising Young Woman, Kajillionaire, The Report, The Big Sick, and Good Luck to You, Leo Grande. Past documentary films include Will & Harper, Still: A Michael J. Fox Movie, Invisible Beauty, The Dissident, Lucy and Desi, and Miss Americana.
All That’s Left of You (اللي باقي منك)/ Germany, Cyprus (Director, Screenwriter, and Producer: Cherien Dabis, Producers: Thanassis Karathanos, Martin Hampel, Karim Amer) — After a Palestinian teen confronts Israeli soldiers at a West Bank protest, his mother recounts the series of events that led him to that fateful moment, starting with his grandfather’s forced displacement. Cast: Cherien Dabis, Saleh Bakri, Adam Bakri, Mohammad Bakri, Maria Zreik, Muhammad Abed Elrahman. World Premiere. Fiction.
April & Amanda/ U.S.A. (Director: Zackary Drucker, Producers: Madison Passarelli, Douglas Banker, Alex Garinger, Noah Levy, Donovan Lovell, Stephen B. Strout) — Two legends contested their identities as women in the court of public opinion: April Ashley, who was immortalized as a trailblazer by embracing her transgender history; and Amanda Lear, who has consciously denied and obfuscated her history for decades. Their divergent paths reveal disparate but intertwined legacies. World Premiere. Documentary.
The Ballad of Wallis Island / U.K. (Director: James Griffiths, Screenwriters: Tom Basden, Tim Key, Producer: Rupert Majendie) — Eccentric lottery winner, Charles, dreams of getting his favorite musicians, Mortimer-McGwyer, back together. His fantasy turns into reality when the bandmates and former lovers accept his invitation to play a private show at his home on Wallis Island. Old tensions resurface as Charles tries desperately to salvage his dream gig. Cast: Tom Basden, Tim Key, Sian Clifford, Akemnji Ndifornyen, Carey Mulligan. World Premiere. Fiction.
Come See Me in the Good Light / U.S.A. (Director and Producer: Ryan White, Producers: Jessica Hargrave, Tig Notaro, Stef Willen) — Two poets, one incurable cancer diagnosis. Andrea Gibson and Megan Falley go on an unexpectedly funny and poignant journey through love, life, and mortality. World Premiere. Documentary.
Deaf President Now!/ U.S.A. (Directors and Producers: Nyle DiMarco, Davis Guggenheim, Producers: Jonathan King, Amanda Rohlke, Michael Harte) — During eight tumultuous days in 1988 at the world’s only Deaf university, four students must find a way to lead an angry mob — and change the course of history. World Premiere. Documentary. Available online for Public.
FOLKTALES / U.S.A., Norway (Directors and Producers: Heidi Ewing, Rachel Grady) — On the precipice of adulthood, teenagers converge at a traditional folk high school in Arctic Norway. Dropped at the edge of the world, they must rely on only themselves, one another, and a loyal pack of sled dogs as they all grow in unexpected directions. World Premiere. Documentary.
Free Leonard Peltier / U.S.A. (Director: Jesse Short Bull, Director and Producer: David France, Producers: Jhane Myers, Paul McGuire) — Leonard Peltier, one of the surviving leaders of the American Indian Movement, has been in prison for 50 years following a contentious conviction. A new generation of Native activists is committed to winning his freedom before he dies. World Premiere. Documentary.
Heightened Scrutiny/ U.S.A. (Director and Producer: Sam Feder, Producers: Amy Scholder, Paola Mendoza) — Amid the surge in anti-trans legislation that Chase Strangio battles in the courtroom, he must also fight against media bias, exposing how the narratives in the press influence public perception and the fight for transgender rights. World Premiere. Documentary. Available online for Public.
If I Had Legs I’d Kick You/ U.S.A. (Director and Screenwriter: Mary Bronstein, Producers: Sara Murphy, Ryan Zacarias, Ronald Bronstein, Josh Safdie, Eli Bush, Richie Doyle) — With her life crashing down around her, Linda attempts to navigate her child’s mysterious illness, her absent husband, a missing person, and an increasingly hostile relationship with her therapist. Cast: Rose Byrne, A$AP Rocky, Conan O’Brien, Danielle Macdonald, Ivy Wolk, Daniel Zolghadri. World Premiere. Fiction.
It’s Never Over, Jeff Buckley / U.S.A. (Director and Producer: Amy Berg, Producers: Ryan Heller, Christine Connor, Mandy Chang, Jennie Bedusa, Matthew Roozen) — Rising musician Jeff Buckley had only released one album when he died suddenly in 1997. Now, never-before-seen footage, exclusive voice messages, and accounts from those closest to him offer a portrait of the captivating singer. World Premiere. Documentary.
Jimpa/ Australia, Netherlands, Finland (Director, Screenwriter, and Producer: Sophie Hyde, Screenwriter: Matthew Cormack, Producers: Liam Heyen, Bryan Mason, Marleen Slot)—Hannah takes her nonbinary teenager, Frances, to Amsterdam to visit their gay grandfather, Jim — lovingly known as Jimpa. But Frances’ desire to stay abroad with Jimpa for a year means Hannah is forced to reconsider her beliefs about parenting and finally confront old stories about the past. Cast: Olivia Colman, John Lithgow, Aud Mason-Hyde. World Premiere. Fiction.
Kiss of the Spider Woman/ U.S.A. (Director and Screenwriter: Bill Condon, Producers: Barry Josephson, Tom Kirdahy, Greg Yolen) — Valentín, a political prisoner, shares a cell with Molina, a window dresser convicted of public indecency. The two form an unlikely bond as Molina recounts the plot of a Hollywood musical starring his favorite silver screen diva, Ingrid Luna. Cast: Diego Luna, Tonatiuh, Jennifer Lopez, Bruno Bichir, Josefina Scaglione, Aline Mayagoitia. World Premiere. Fiction.
Last Days/ U.S.A. (Director and Producer: Justin Lin, Screenwriter: Ben Ripley, Producers: Clayton Townsend, Ellen Goldsmith-Vein, Eric Robinson, Salvador Gatdula, Andrew Schneider) — Determined to fulfill his life’s mission, 26-year-old John Allen Chau embarks on a dangerous adventure across the globe to convert the uncontacted tribe of North Sentinel Island to Christianity, while a detective from the Andaman Islands races to stop him before he does harm to himself or the tribe. Cast: Sky Yang, Radhika Apte, Naveen Andrews, Ken Leung, Toby Wallace, Ciara Bravo. World Premiere. Fiction.
The Librarians / U.S.A. (Director and Producer: Kim A. Snyder, Producers: Janique L. Robillard, Maria Cuomo Cole, Jana Edelbaum) — As an unprecedented wave of book banning is sparked in Texas, Florida, and beyond, librarians under siege join forces as unlikely defenders fighting for intellectual freedom on the front lines of democracy. World Premiere. Documentary.

Lurker
Courtesy of Sundance Institute
Lurker/ U.S.A. (Director and Screenwriter: Alex Russell, Producers: Alex Orlovsky, Duncan Montgomery, Galen Core, Charlie McDowell, Archie Madekwe) — A retail employee infiltrates the inner circle of an artist on the verge of stardom. As he gets closer to the budding music star, access and proximity become a matter of life and death. Cast: Théodore Pellerin, Archie Madekwe, Havana Rose Liu, Sunny Suljic, Zack Fox, Daniel Zolghadri. World Premiere. Fiction.
Magic Farm / Argentina, U.S.A. (Director and Screenwriter: Amalia Ulman, Producers: Alex Hughes, Eugene Kotlyarenko, Riccardo Maddalosso) — A film crew working for an edgy media company travels to Argentina to profile a local musician, but their ineptitude leads them into the wrong country. As the crew collaborates with locals to fabricate a trend, unexpected connections blossom while a pervasive health crisis looms unacknowledged in the background. Cast: Chloë Sevigny, Alex Wolff, Joe Apollonio, Camila del Campo, Simon Rex. World Premiere. Fiction.
Middletown / U.S.A. (Directors, Screenwriters, and Producers: Jesse Moss, Amanda McBaine, Producers: Teddy Leifer, Florrie Priest, Danny Breen) — Inspired by an unconventional teacher, a group of teenagers in upstate New York in the early 1990s made a student film that uncovered a vast conspiracy involving toxic waste that was poisoning their community. Thirty years later, they revisit their film and confront the legacy of this transformative experience. World Premiere. Documentary.
Move Ya Body: The Birth of House/ U.S.A. (Director and Screenwriter: Elegance Bratton, Producer: Chester Algernal Gordon) — Out of the underground dance clubs on the South Side of Chicago, a group of friends turn a new sound into a global movement. World Premiere. Documentary.
Oh, Hi!/ U.S.A. (Director, Screenwriter, and Producer: Sophie Brooks, Producers: David Brooks, Dan Clifton, Julie Waters, Molly Gordon) — Iris and Isaac’s first romantic weekend getaway goes awry. Cast: Molly Gordon, Logan Lerman, Geraldine Viswanathan, John Reynolds. World Premiere. Fiction.
Peter Hujar’s Day / U.S.A. (Director and Screenwriter: Ira Sachs, Producers: Jordan Drake, Jonah Disend) —A recently discovered conversation between photographer Peter Hujar and his friend Linda Rosenkrantz in 1974 reveals a glimpse into New York City’s downtown art scene and the personal struggles and epiphanies that define an artist’s life. Cast: Ben Whishaw, Rebecca Hall. World Premiere. Fiction.
Rebuilding / U.S.A. (Director and Screenwriter: Max Walker-Silverman, Producers: Jesse Hope, Dan Janvey, Paul Mezey) — After a wildfire takes the family farm, a rancher seeks a way forward. Cast: Josh O'Connor, Lily LaTorre, Meghann Fahy, Kali Reis, Amy Madigan. World Premiere. Fiction.
SALLY/ U.S.A. (Director, Screenwriter, and Producer: Cristina Costantini, Screenwriter: Tom Maroney, Producers: Lauren Cioffi, Dan Cogan, Jon Bardin) — Sally Ride became the first American woman to blast off into space, but beneath her unflappable composure was a secret. Sally’s life partner, Tam O’Shaughnessy, reveals their hidden romance and the sacrifices that accompanied their 27 years together. World Premiere. Documentary. Available online for Public. 2025 Alfred P. Sloan Feature Film Prize Winner.
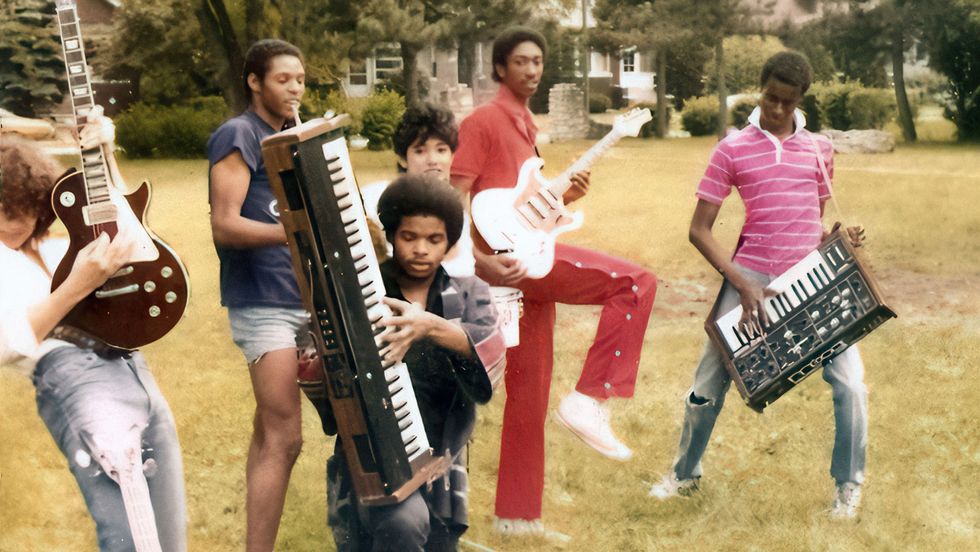
SLY LIVES! (aka The Burden of Black Genius) / U.S.A. (Director: Ahmir “Questlove” Thompson, Producers: Joseph Patel, Derik Murray) — An examination of the life and legacy of Sly & The Family Stone — the groundbreaking band led by the charismatic and enigmatic Sly Stone — captures the band’s rise, reign, and subsequent fadeout while shedding light on the unseen burden that comes with success for Black artists in America. World Premiere. Documentary.
The Thing with Feathers / U.K. (Director and Screenwriter: Dylan Southern, Producers: Andrea Cornwell, Leah Clarke, Adam Ackland) — Struggling to process the sudden and unexpected death of his wife, a young father loses his hold on reality as a seemingly malign presence begins to stalk him from the shadowy recesses of the apartment he shares with his two young sons. Cast: Benedict Cumberbatch, Richard Boxall, Henry Boxall, Eric Lampaert, Vinette Robinson, Sam Spruell. World Premiere. Fiction.
Train Dreams / U.S.A. (Director and Screenwriter: Clint Bentley, Screenwriter: Greg Kwedar, Producers: Marissa McMahon, Teddy Schwarzman, Will Janowitz, Ashley Schlaifer, Michael Heimler) — Robert Grainier is a day laborer building America’s railroads at the start of the 20th century as he experiences profound love, shocking defeat, and a world irrevocably transforming before his very eyes. Cast: Joel Edgerton, Felicity Jones, Kerry Condon, William H. Macy. World Premiere. Fiction. Salt Lake Celebration Film.
The Wedding Banquet/ U.S.A. (Director and Screenwriter: Andrew Ahn, Screenwriter and Producer: James Schamus, Producers: Anita Gou, Joe Pirro, Caroline Clark) — Frustrated with his commitment-phobic boyfriend, Chris, and out of time, Min makes a proposal: a green card marriage with his friend Angela in exchange for expensive in vitro fertilization treatments for her partner, Lee. Plans change when Min’s grandmother surprises them with an elaborate Korean wedding banquet. Cast: Bowen Yang, Lily Gladstone, Kelly Marie Tran, Han Gi-chan, Joan Chen, Youn Yuh-jung. World Premiere. Fiction.
MIDNIGHT

Opus
Courtesy of Sundance Institute
From horror flicks and wild comedies to chilling thrillers and works that defy any genre, these films will keep you wide-awake and on the edge of your seat. Films that have premiered in this category in recent years include I Saw the TV Glow, Love Lies Bleeding, Infinity Pool, Talk to Me, FRESH, Hereditary, Mandy, Relic,and The Babadook.
Dead Lover/ Canada (Director, Screenwriter, and Producer: Grace Glowicki, Screenwriter and Producer: Ben Petrie, Producer: Yona Strauss) — A lonely gravedigger who stinks of corpses finally meets her dream man, but their whirlwind affair is cut short when he tragically drowns at sea. Grief-stricken, she goes to morbid lengths to resurrect him through madcap scientific experiments, resulting in grave consequences and unlikely love. Cast: Grace Glowicki, Ben Petrie, Leah Doz, Lowen Morrow. World Premiere. Fiction.
Didn’t Die/ U.S.A. (Director, Screenwriter, and Producer: Meera Menon, Screenwriter and Producer: Paul Gleason, Producers: Erica Fishman, Joe Camerota, Luke Patton) — A podcast host desperately clings to an ever-shrinking audience in the zombie apocalypse. Cast: Kiran Deol, George Basil, Samrat Chakrabarti, Katie McCuen, Vishal Vijayakumar. World Premiere. Fiction. Available online for Public.
Opus/ U.S.A. (Director, Screenwriter, and Producer: Mark Anthony Green, Producers: Collin Creighton, Brad Weston, Poppy Hanks, Jelani Johnson, Josh Bachove) — A young writer is invited to the remote compound of a legendary pop star who mysteriously disappeared 30 years ago. Surrounded by the star’s cult of sycophants and intoxicated journalists, she finds herself in the middle of his twisted plan. Cast: Ayo Edebiri, John Malkovich, Juliette Lewis, Murray Bartlett, Amber Midthunder. World Premiere. Fiction.
Rabbit Trap/ U.K. (Director and Screenwriter: Bryn Chainey, Producers: Daniel Noah, Lawrence Inglee, Elijah Wood, Elisa Lleras, Adrian Politowski, Martin Metz) — When a musician and her husband move to a remote house in Wales, the music they make disturbs local ancient folk magic, bringing a nameless child to their door who is intent on infiltrating their lives. Cast: Dev Patel, Rosy McEwen, Jade Croot. World Premiere. Fiction.
Together / Australia, U.S.A. (Director and Screenwriter: Michael Shanks, Producers: Dave Franco, Alison Brie, Mike Cowap, Andrew Mittman, Erik Feig, Max Silva) — With a move to the countryside already testing the limits of a couple’s relationship, a supernatural encounter begins an extreme transformation of their love, their lives, and their flesh. Cast: Alison Brie, Dave Franco, Damon Herriman. World Premiere. Fiction.
Touch Me / U.S.A. (Director, Screenwriter, and Producer: Addison Heimann, Producers: John Humber, David Lawson Jr.) — Two codependent best friends become addicted to the heroin-like touch of an alien narcissist who may or may not be trying to take over the world. Cast: Olivia Taylor Dudley, Lou Taylor Pucci, Jordan Gavaris, Marlene Forte, Paget Brewster. World Premiere. Fiction.
The Ugly Stepsister / Norway (Director and Screenwriter: Emilie Blichfeldt, Producer: Maria Ekerhovd) — In a fairy-tale kingdom where beauty is a brutal business, Elvira battles to compete with her incredibly beautiful stepsister, and she will go to any length to catch the prince’s eye. Cast: Lea Myren, Thea Sofie Loch Næss, Ane Dahl Torp, Flo Fagerli, Isac Calmroth, Malte Gårdinger. World Premiere. Fiction.
SPOTLIGHT

One to One: John & Yoko
Courtesy of Sundance Institute
The Spotlight program is a tribute to the cinema we love, presenting films that have played throughout the world. Films that have played in this category in recent years include Hit Man, Joyland, The Worst Person in the World, The Biggest Little Farm, The Rider, Ida, and The Lobster.Spotlight is presented by Audible.
April/ Georgia (Director and Screenwriter: Dea Kulumbegashvili, Producers: Luca Guadagnino, David Zerat, Francesco Melzi d’Eril, Archil Gelovani, Gabriele Moratti, Alexandra Rossi) — Nina is an obstetrician at a maternity hospital in Eastern Georgia. After a difficult delivery, an infant dies and the father demands an inquiry into her methods. The scrutiny threatens to expose Nina’s secret side job — visiting village homes of pregnant girls and women to provide unsanctioned abortions. Cast: Ia Sukhitashvili, Kakha Kintsurashvili. Fiction.
One to One: John & Yoko/ U.K. (Director and Producer: Kevin Macdonald, Producers: Peter Worsley, Alice Webb) — An exploration of the seminal and transformative 18 months that one of music’s most famous couples — John Lennon and Yoko Ono — spent living in Greenwich Village, New York City, in the early 1970s. Documentary.
EPISODIC

Hal & Harper
Courtesy of Sundance Institute
Our Episodic section was created specifically for bold stories told in multiple episodes, with an emphasis on independent perspectives and innovative storytelling. Past projects that have premiered within this category include Penelope, LOLLA: THE STORY OF LOLLAPALOOZA, Willie Nelson and Family, OJ: Made in America, Wild Wild Country, The Jinx, Work in Progress, State of the Union, Gentefied, Wu-Tang Clan: Of Mics and Men, and Quarter Life Poetry.
Bucks County, USA / U.S.A. (Directors and Executive Producers: Barry Levinson, Robert May, Executive Producer: Jason Sosnoff) — Evi and Vanessa, two 14-year-olds living in Bucks County, Pennsylvania, are best friends despite their opposing political beliefs. As nationwide disputes over public education explode into vitriol and division in their hometown, the girls and others in the community fight to discover the humanity in “the other side.” World Premiere. Documentary. Five-part docu-series, screening episodes one and two.
Hal & Harper / U.S.A. (Director and Executive Producer: Cooper Raiff, Executive Producers: Clementine Quittner, Lili Reinhart, Daniel Lewis, Addison Timlin) — Hal and Harper and Dad chart the evolution of their family. Cast: Lili Reinhart, Mark Ruffalo, Betty Gilpin, Havana Rose Liu, Addison Timlin, Alyah Chanelle Scott. World Premiere. Fiction. Available Online for Public. Eight-episode season, screening first four episodes in person and full season online.
Pee-wee as Himself/ U.S.A. (Director: Matt Wolf, Producer: Emma Tillinger Koskoff) — A chronicle of the life of artist and performer Paul Reubens and his alter ego Pee-wee Herman. Prior to his recent death, Reubens spoke in-depth about his creative influences, and the personal struggles he faced to persevere as an artist. World Premiere. Documentary. Two-part documentary, screening in its entirety.
Episodic Pilot Showcase:
BULLDOZER/U.S.A. (Writer and Executive Producer: Joanna Leeds, Director and Executive Producer: Andrew Leeds, Executive Producers: Rhett Reese, Caleb Reese) — An undermedicated, chronically impassioned young woman lurches from crisis to crisis of her own making. Cast: Joanna Leeds, Mary Steenburgen, Nat Faxon, Harvey Guillen, Allen Leech, Kate Burton. World Premiere. Fiction. Available online for Public.
Chasers /U.S.A. (Director, Screenwriter, and Producer: Erin Brown Thomas, Screenwriter: Ciarra Krohne, Producers: Elle Shaw, Olivia Haller, Beth Napoli, Hayden Greiwe) — At a Los Angeles house party, an aspiring musician pursues her crush through a crowd of hopeful dreamers chasing empty promises. Cast: Ciarra Krohne, Louie Chapman, Keana Marie, Shannon Gisela, Brooke Maroon, Xan Churchwell. World Premiere. Fiction. Available online for Public.
Never Get Busted! /Australia (Showrunners: David Anthony Ngo, Erin Williams-Weir, Executive Producers: John Battsek, Chris Smith) — Barry Cooper was a highly decorated Texas narcotics officer — until he turned on the police force by busting crooked cops and teaching drug users how to hide their stash. World Premiere. Documentary.
FAMILY MATINEE

The Legend of Ochi
Courtesy of Sundance Institute
For over a decade, the Family Matinee section of the Festival (formerly known as KIDS) has been built for audiences of all ages, but especially for our youngest independent film fans. Films that have played in this category in recent years include Out of My Mind, Blueback, The Elephant Queen, Science Fair, The Eagle Huntress, and Shaun the Sheep.
The Legend of Ochi / U.S.A. (Director, Screenwriter, and Producer: Isaiah Saxon, Producers: Richard Peete, Traci Carlson, Jonathan Wang) — In a remote village on the island of Carpathia, a farm girl named Yuri is raised to fear an animal species known as Ochi. But when Yuri discovers a wounded baby Ochi has been left behind, she escapes on an adventure to bring him home. Cast: Helena Zengel, Finn Wolfhard, Emily Watson, Willem Dafoe. World Premiere. Fiction.
SPECIAL SCREENINGS

The Six Billion Dollar Man
Courtesy of Sundance Institute
One-of-a-kind moments highlight new independent works that add to the unique Festival experience.
The Six Billion Dollar Man / U.S.A. (Director: Eugene Jarecki, Producer: Kathleen Fournier) — Julian Assange faced a possible 175 years in prison for exposing U.S. war crimes until events took a turn in this landmark case. World Premiere. Documentary. Available online for Public.
FROM THE COLLECTION

El Norte
Courtesy of Sundance Institute
From the Collection screenings give audiences the opportunity to discover and rediscover the films that have shaped the heritage of both Sundance Institute and independent storytelling. To address the specific preservation risks posed to independent film, Sundance Institute partnered with UCLA Film & Television Archive in 1997 to form the Sundance Institute Collection at UCLA and preserve independent films supported by Sundance Institute.
El Norte/ U.S.A. (Director and Screenwriter: Gregory Nava, Screenwriter and Producer: Anna Thomas) — After their family is murdered by the government in a massacre during the Guatemalan Civil War, Indigenous siblings Rosa and Enrique flee up “Norte” to the United States for a chance at survival. When they arrive, they find life in the U.S. is not what they had hoped for. Cast: Zaide Silvia Gutiérrez, David Villalpando, Ernesto Gómez Cruz, Lupe Ontiveros, Trinidad Silva, Alicia del Lago. Fiction.
This is a 4K digital restoration from the original negative, restored in 2017 by the Academy Film Archive, supported in part by the Getty Foundation. This screening is courtesy of Lionsgate.
Unzipped/ U.S.A. (Director: Douglas Keeve, Producer: Michael Alden) — Director Douglas Keeve goes behind the scenes of designer Isaac Mizrahi’s relentless drive and bold vision to bring his 1994 collection to life. From sketches to runway, this insider’s journey is packed with backstage drama, creative triumphs, and iconic supermodels, including Cindy Crawford, Naomi Campbell, and Linda Evangelista. Documentary.
The film is a brand new digital restoration from a 4k scan of the 35mm interpositive and DA-88 audio files. It has been restored by Sundance Institute and UCLA Film & Television Archive, funded by Isaac Mizrahi Entertainment.
