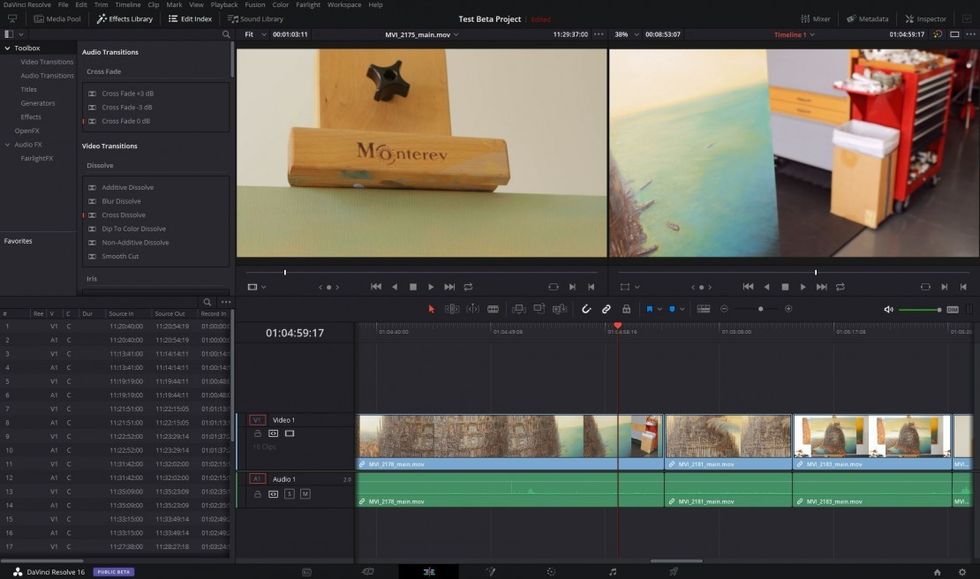
DaVinci Resolve 16 Is Now Ready for Your Entire Post Workflow
Blackmagic DaVinci Resolve 16 Beta 2 has been released. Here's a complete guide to all of its important new tools.
A decade ago, Blackmagic Design revolutionized color grading for the masses by turning the high-end, hardware-based DaVinci Resolve into a hardware agnostic software accessible to the masses. In the intervening years, they have continued to add features to it, creating a competitive all-in-one post solution. The iterations have been at times painful (as anyone who tried to edit anything substantial in versions 12 or 13 well knows).
After spending a little time looking under the hood of Beta Version 2, we can say that there is a lot going on here beyond the main bullet points addressed in the initial NAB announcement. Blackmagic has created a fully integrated, collaborative post-production workflow suitable for everything from quickie web content to features.
Cut Page: Simplicity and Speed
The most significant new feature to Resolve is the addition of the cut page. It is designed for quick timeline assembly, with a sleek uncluttered interface that will fit nicely on laptops. The goal here is simplicity and removing steps in the editing process. However, it also contains nearly all the features of the main edit page, allowing you to get as granular as you like (if you are willing to dig a little more in the interface).
This approach is smart and appeals to multiple use cases, most obviously people wanting to turn around simple projects quickly, say for news or web content. It also makes sense for team collaboration, assistant editors or even producers making quick timelines for editors to use as starting points for more substantial editing. Because the cut page timeline shows up as a fully functional timeline within all the other Resolve pages, this offers a great deal of workflow flexibility.
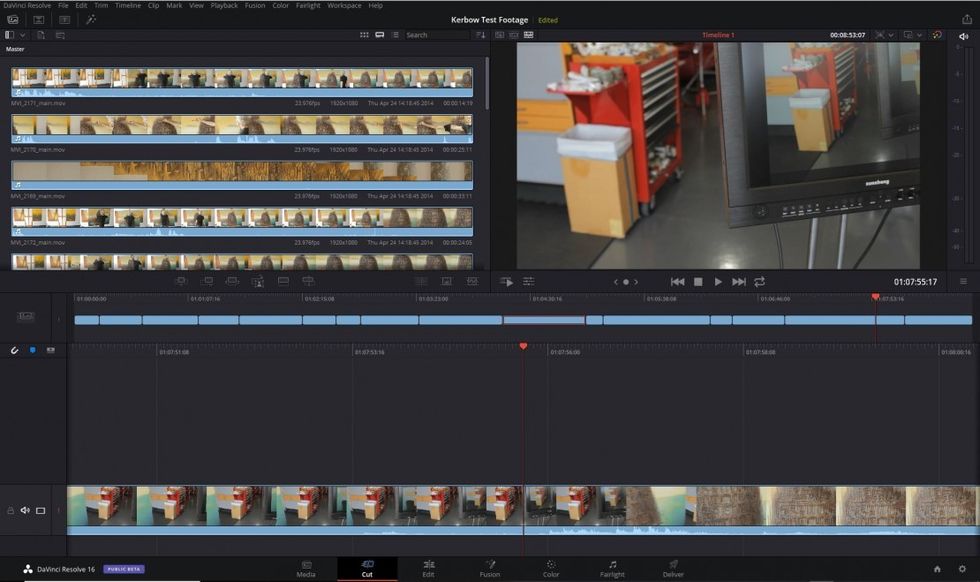
How does the cut page differ from the edit page? Most importantly, the cut page only allows you to work with one timeline at a time. And even though it is a fully featured editor, to get beyond the basics you are going to have to dig a little bit more in the UI (unless you pair it with the new Editor Keyboard from Blackmagic). There are two other features that are exclusive to the Cut Page: dual timeline views and source tape view in the media bins.
The dual timeline concept is simple: the top timeline view will always incorporate your entire timeline, making it easy to jump around and keep track of what you are doing and where. It contains all your tracks, color-coded by type. The bottom timeline is your standard editing view and can be expanded for precision cuts. What is most useful is that you can grab clips either timeline view or drag them onto the other.
This is handy when you want to move a clip from the end of a timeline to the beginning. Again, this is meant to make certain types of broader editing faster, removing steps like having to scale your timeline up and down to find clips or the playhead.
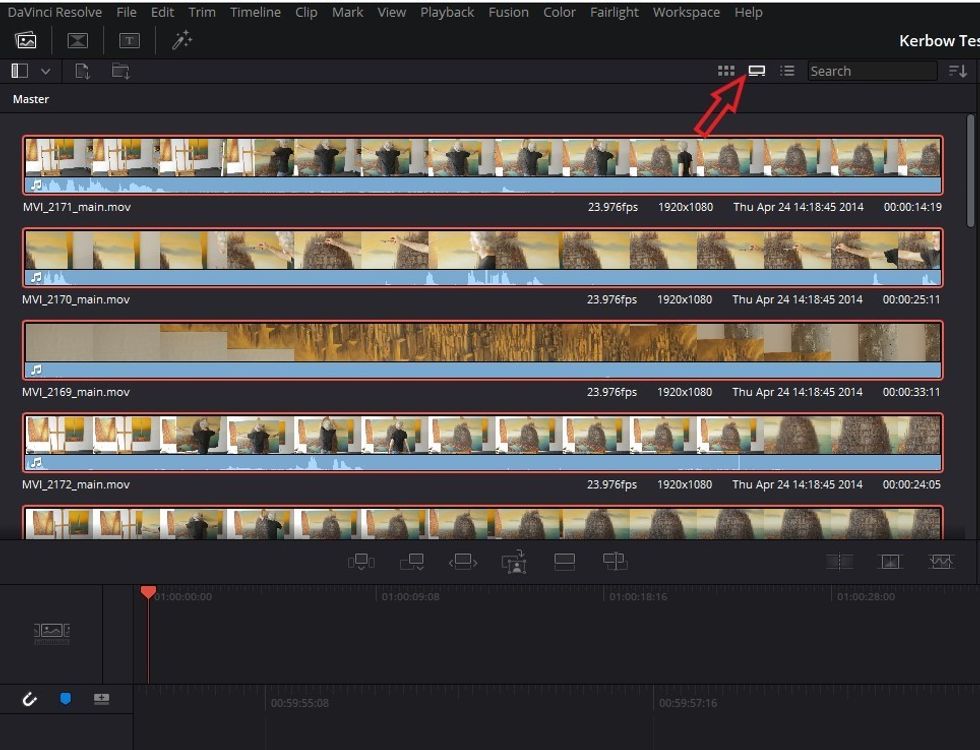
Finally, Blackmagic has added several other tools to speed up the editing process:
- dedicated trim tool in the viewer, allowing editors to make accurate cuts quickly.
- predictive editing behavior, depending on playhead position.
- dedicated transition and edit buttons.
This video by Alex Jordan (Learn Color Grading) does a good job of describing how the cut page can speed up your workflow.
Edit Page: Flexibility and Collaboration
If the cut page is about speed, Blackmagic is making it clear that they intend for the edit page to be a full-fledged professional solution suitable for post houses and collaborative environments. Here are a few of the many major improvements:
Timelines: You will now be able to open and work in multiple, stacked timelines within the edit page. This is big: multiple, fully functional timelines viewable at the same time. In addition, each of those timelines can be in different formats/settings within the same project. A single project can have a timeline for editing, say with proxies, and others for color or effects at full resolution. Post houses will be better able to manage their shared storage/network loads by allocating only the bandwidth needed for each process. This includes being able to set multiple outputs from the same project to different rooms. Finally, in version 16, you will be able to change existing settings for timelines after they have been created, a long time ask from users.
Plug-in support: The edit page now supports both the built-in ResolveFX and 3rd party OpenFX transition and generator plug-ins. Image stabilization and speed warp retiming have also been added to the edit page. These are big workflow improvements, allowing editors to do substantially more within it.
Keyframe animation and curve editor: You will now be able to add and edit keyframes directly within the timeline. The keyframes are positioned directly below each clip, making it easier to find, edit and copy them.
Audio: Tape style scrubbing now has pitch correction, making audio easier to understand while scrubbing through a track. You will now also be able to see a full audio waveform overlay with the video within the source viewer, making it easier to make more precise edits.
Title templates: The edit page now includes pre-designed Fusion 2D and 3D titles.
Subtitles and closed captioning: Import SRT files or manually create subtitles and closed captioning.
Safe areas: Ability to create custom action and title safe areas.
Color Page: Continuous Improvement
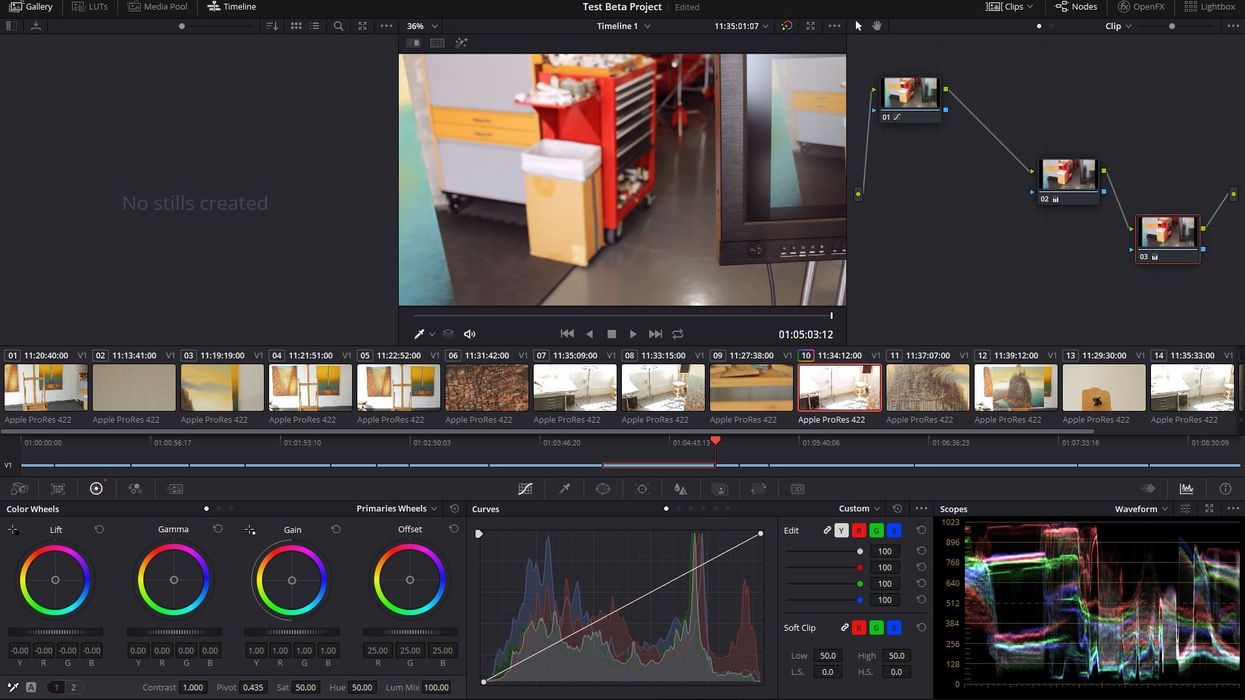
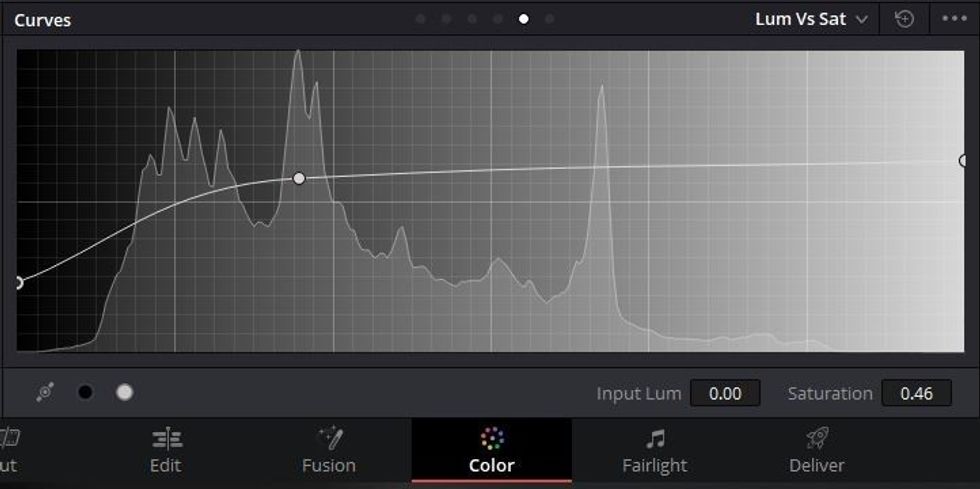
Ironically, given that Resolve started out as a colorist only tool, the color function received a lot less focus at NAB. However, Blackmagic has continued to make important, if less glamorous, improvements to it. The most useful is the addition of histograms within the curve functions. It will make it easier to see exactly which part of the curve you are affecting as you adjust, particularly useful when you are trying to roll-off highlights or shadows. It doesn’t replace scopes, but it does speed up your workflow.
Keyframe editor/plugins: Now supports viewing and editing keyframes for ResolveFx and OpenFx plugins directly within the color page. They have also made Resolve compatible with more third-party plugins.
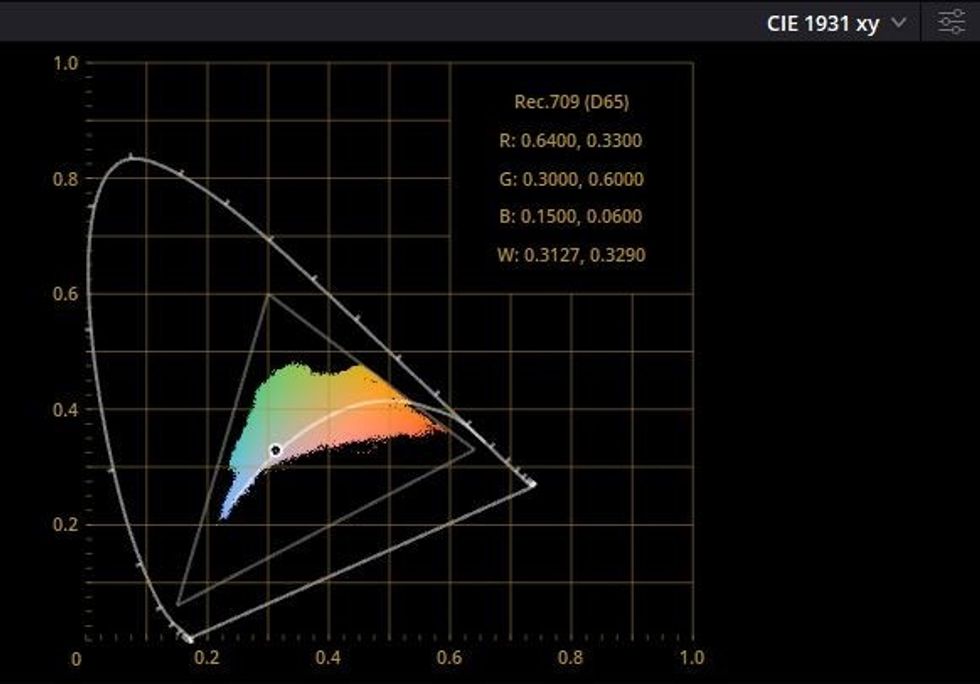
Scopes: They have added CIE (gamut) scopes as an option and have improved scope performance by making them GPU accelerated. There is also a function under the View menu to show all the broadcast safe exceptions, so you essentially have a QC report as you work. There are also multiple new view options for existing scopes.
LUT browser: A visual LUT browser has been added, making it easy to find, compare and preview your LUT’s quickly.
Copy/paste attributes: Now when you copy the color, tracking and plugin effects from a node, you can paste only the attributes you want onto another node.
Fusion: Under the Hood Improvements
Most of the upgrades in Fusion relate to performance and accuracy:
- improved GPU accelerated performance in 3D operations
- all mask operations are faster
- improved accuracy and performance in planar and camera trackers
- many more GPU accelerated tools, like time effects, dissolves, vector motion.
- improved caching with smart cache and user cache.
- better memory management.
Neural Engine: AI for Post
Blackmagic has added the power of deep neural networks and AI to power new, or improved, features within Resolve. A few highlights:
- facial recognition to automatically sort and organize bins by people included in shots
- auto color and auto shot match tools now use the engine to process images resulting in greater accuracy.
- speed warp motion estimation for retiming
- super scale for improved footage up-scaling.
Fairlight: New Tools
- ability to mix and master 3D audio formats like Dolby Atmos, Auro 3-D and SMPTE 2098.
- a substantial royalty free foley sound library
- new FairlightFX plugins like frequency analyzer, phase meter and a dialog processor.
- support for more loudness monitoring standards such as ATSC, 1770 and R128.
Delivery: Frame.io Integration
Frame.io has entered into a partnership with Blackmagic and starting with version 16, its collaboration toolset is natively built into Resolve. This is smart for Blackmagic, rather than trying to develop their own cloud storage/collaboration toolset, they’re going all-in with an industry leader. Once you log you’re your Frame.io account from within Resolve, the account will automatically sync with Resolve, including media and comments. Frame.io shows up as just another source on the media page. If media files are high resolution, you can start editing them immediately with Frame.io generated proxies while the entire files are download in the background. Once the files are downloaded, they are automatically swapped out with the proxies. On the render page, Frame.io appears as another preset, alongside YouTube, Vimeo, etc.
Collaboration: Access and Performance
- ability to lock bins and restrict timeline access (in color on a per clip basis and in editorial per timeline.
- read-only mode enables other users to view timelines and copy/paste assets without affecting other users.
- ability to create, edit and add notes viewable by all users
- users in collaborative projects can generate and manage their own cache files to optimize performance on their system.
Conclusion
Remarkably, nearly all these features are still available for free with Davinci Resolve 16. For $299, Davinci Resolve Studio is available and includes the following features not found in the free version: Neural Engine features, multi user collaboration, stereoscopic 3D tools, dozens of ResolveFX and FairlightFX plugins, HDR grading, film grain, blur and mist effects, and more. Or, you could buy the new Pocket Cinema Camera 4K for $1295 and get Resolve Studio for free.
Blackmagic has made some strategic choices here to better compete with each of the other major products on the market. It will be interesting to see if Resolve, coupled with the new BRAW codec and the improved camera line will truly be able to be most things to most people. With version 16, they have shown that they are engaged and listening to their customers.
Let us know whether you think Resolve 16 will meet your particular workflows in the comments below.
