6 Tricks for Faking a Car Crash
What a Tribeca-premiering indie filmmaker did with the opening sequence of his film.
'Westhampton'
You always want your opening sequence to grab attention. How can you set up your story and hook the audience, all in one go? And how can you do it on a low budget but still get that big set piece?
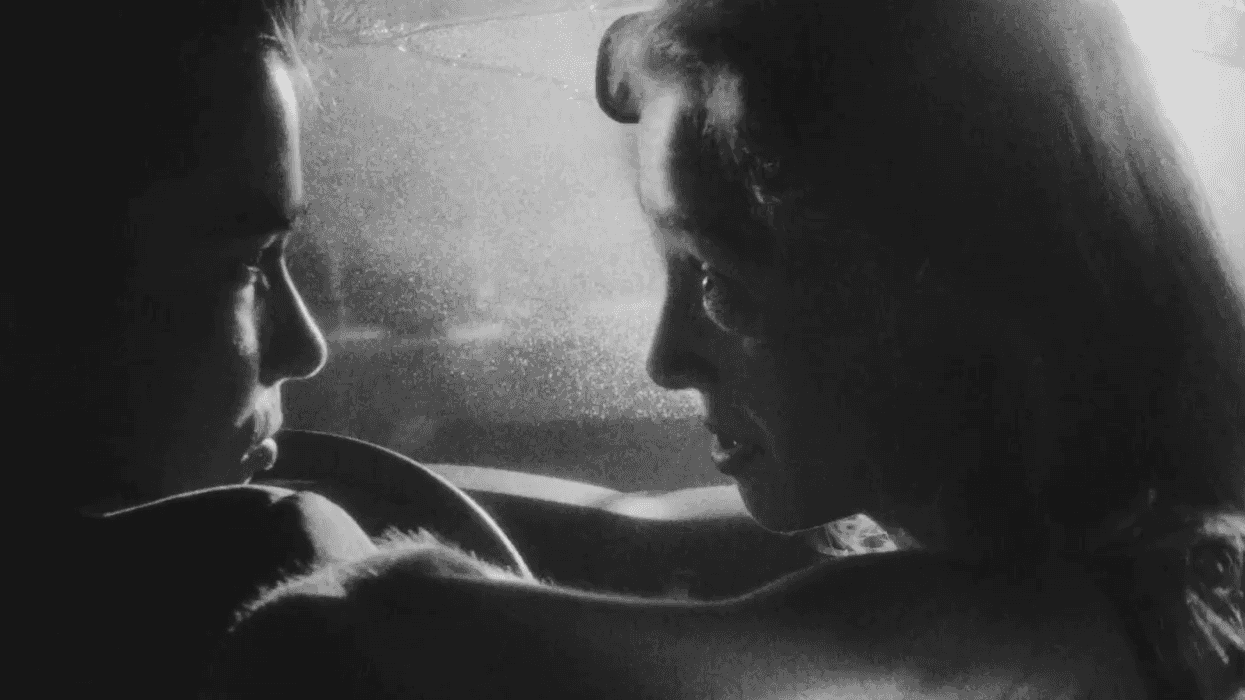
For Westhampton, writer/director Christian Nilsson opens with a car crash. It introduces us to protagonist Tom Bell (Finn Wittrock), sets up the film-within-a-film structure the rest of the movie uses, acts as an inciting incident, and gets the audience emotionally invested.
They had no money for a stunt crash or a green screen. For safety, the actors also couldn't be in a moving vehicle. (You always want to defer to the safest option.)
Westhampton premiered at Tribeca in 2025, won the Jury Award for Directing at Stony Brook, was picked up by Obscured Releasing, and is now on Apple TV. (Nilsson is also the filmmaker who briefly topped the U.S. box office in June 2020 with his short Unsubscribe by exploiting a pandemic-era distribution loophole. He has a track record of clever workarounds.)
Every low-budget filmmaker knows the pressure of a sequence that just has to look good, even if you know you're punching above your weight class. But thankfully, practical effects still go a long way, and modern editing tools let you achieve a lot.
In a recent TXE Productions video, Nilsson goes through the six techniques his team used in their big sequence.
- YouTube www.youtube.com
Rear Projection
Rear projection is a classic method still in heavy rotation.
Curry Barker used the modern version of it, the LED volume, for all the car shots in Obsession. And they were technically a lower-budget film. Christopher Nolan used it in Oppenheimer. The technique is old, like close to a century old, and it still works because it puts real light in front of your camera.
That's where Nilsson and his team started.
"First, rear screen projection. Our cinematographer, Dave Brick, rigged a camera to the hood of my car, and we captured a number of background plates at a train crossing near where I grew up. And while we were there, we filmed a few shots of our picture car that didn't require any actors. Then, we projected the footage on the biggest screen we could find using the brightest projector."
The plates were shot at the actual Long Island train crossing where the fictional accident takes place.
We have covered the history of rear projection if you want the wider context on where the technique came from and why it keeps coming back.
Practical Rain and Lighting
Making things feel real often involves just layering more effects on top of each other to sell it.
Once the plate was projected, the team added two more physical elements to sell the illusion—rain and light.
The rain was, no exaggeration, a garden hose aimed at the windshield. The lighting mimicked street lamps and the flash of a train crossing.
"It subtly obscures the background while adding another physical layer to the frame," Nilsson said. "Lighting adds another layer. We programmed lights to imitate street lamps and flash like at a train crossing. And that reads on our subject. It reads on the rain on the windshield, and it creates this cause and effect that tricks your mind into believing that the background plate is real."
What sells the effect is the things in the plate having an effect on the real items in the frame.
Performance and Choreography
I just saw a TikTok this week where a small team faked a car collision, with an actor hitting the hood of a car, in just a few steps. Much like here, part of what sells it before the edit is the actors' reaction. All that actor had to do on the day was run into the road and give a little jump.
The cast in the crash scene is Luke Slattery and Emily Jayne, in a stationary car in an empty warehouse in Newark, New Jersey. Their job is to transport the audience to a train crossing on Long Island.
"While we want this to look like our characters aren't in control, we need to stage this in a way so that no one gets hurt. Our actors, our camera, lights, even the background plates are moving in sync."
Nilsson counts the sequence out on set, and everything hits together. The actors do their impact reaction, which just requires a slight jolt that's much safer than exerting any real force on the individual. The camera shakes. The lights change. The background plates advance.
They faked an airbag using a pillowcase. That might seem janky, and if you look closely, you might notice that the fabric isn't exactly right, but sometimes filmmaking is in fact janky. For a shot this quick, it only needs to look serviceable, not perfect. The everyday viewer probably won't even notice.
Editing
This is where those elements that might feel cobbled together… or janky… come together perfectly. A cut and color correction pass will help; then taking out all the air will help the crash feel immediate and dangerous.
"To make the impact in this sequence appear more jarring, our editor, Terence Krey, removed two or three frames after that hit and punched into that image by maybe about 10%. From there, it was all about cutting it together in a way that told the story best without ever showing our hand. We added a subtle rain overlay, some sound design, and voila."
Remove those frames! You're not married to them. Editor Vashi Nedomansky, who has cut features including Deadpool, recommended the same trick, and it's also used in Star Wars, Avatar, the Bond franchise, and effectively every martial arts film ever made. Nedomansky yanks the frames before the hit to accelerate the moment. Nilsson yanks them after, so the impact reads as jarring and discontinuous. Both work.
Modern digital cameras give you enough resolution that you can do this easily.
Sound design is the cherry on top. A convincing crash is a sequence of sounds, so a layered impact pass is necessary, just like your visual layers.
So look at old tricks, layer them, and cheat where you can!